Tuesday, September 3, 2013

La Tale Guardian Guide

Below is an article titled La Tale Guardian Guide that we collected from various sources. All credit goes to its original writer.

La Tale Guardian Guide by TsubasaNeko

I. Stat Build

The main stat that you must build up is either of the following:

A.) Strength and Luck = pure damage

B.)Stamina and Strength = high hp and Ok damage

You must be wondering why Strength is always mentioned, the main reason for this is—-“Strength gives you +0.42 damage per Strength point” and that could mean a lot when it comes to damage so more DAMAGE = more kills and less deaths. Stamina dictates your HITPOINTS/HP, it is also responsible for Knockback’s/KB which means the higher your Stamina is the less you get knock backed/stun-locked etc. for some reason it gives you a little defense as well or so as what some people say you may find stamina to be essential if you are planning to be a survival type guardian. Luck gives you more chance to hit CRITICAL, so the more Luck you have the BIGGER DAMAGE you make and the BIGGER DAMAGE you make the faster you kill.

Note:
Always enchant either of the 3 main stats for killing and survivability. Luck = Crits Str = Base damage+ Sta = HP + Def. Here is a very good explanation of how to super enchant your Accessories/Weapon/Armor:

—>>La Tale How To Enchant Your Gear Guide

II. Techniques and Things you might need to know

Guardians/Saints are considered one of the most formidable classes in PvP, they are well-known for their Long-ranged attacks that deals constant damage and Short-ranged deadly attacks as well. The techniques are pretty simple, with a little practice you can be almost “Unkillable” in PvP if that’s even a word. LOL
A.) Know your range – a guardian must be aware of their position when attacking an opponent, they must be in the right range when using a skill. One wrong move could lead to a miss kill so figure out how far or short your skills are before even using them.

B.) Be familiar with the battle field – some stages/areas where you PvP gives you BONUSES like Speed boost, HP recovery etc. for example the Invoke area, on top of it there is a [?] that gives you a full HP heal that refills every 10secs. or so. Take note on that. :)

C.) MOVE around A LOT and make a full use of Dragon Kick – by moving a lot I meant that literally, Guardians are really nasty they move a lot and because of that they get hit less, some of your skills are better done by jumping, running, moving behind an opponent, etc. so its more like hit and run. Dragon Kick deals multiple hits, and while you are doing this skill notice that this cannot be cancelled unlike some skills that has a long animation that can be cancelled, during the time that you use Dragon Kick you are INVULNERABLE for roughly 1-2secs.(or more) that depends on the height of your jump. By the way, Dragon Kick can only be used after a jump/followed by a jump. Example of this is Crescent Kick.

D.) JAS – you must be wondering what this abbreviation mean, it means Jump->Attack[plain/hard]->Skill. This is a particular technique that you MUST master. Unlike the Wizard class and some of its advancement they can only do this by exchanging their PvP points for a book that allows them to JAS, and compared to you this is for free!!! All your skills are situational and your aerials are deadly USE THEM WELL.

E.) Opponents skills & Crouching uppercut – this is self explanatory. To be a victor, a Guardian must know an opponents skill and its animation. Crouching is the key for better survival, less damage is taken when you crouch so if you know how long an opponent skill is you will probably know when to attack next or what move to do however crouching alone is not a good technique because “Uppercut” is also important. The “Uppercut” launches the opponent in midair and breaks guard which is crouching. This can be obtained by exchanging your PvP points then placing the skill on your shortcut keys.

F.) Back dash/PvP Counter attack – Can only be obtained by exchanging PvP points to Lemy. Back dash allows you to do a backflip, you are immune to skills/spells when doing this. Not only that, when used at the right situation you can actually evade and go behind an opponent and mash him/her with your skills. :)) PvP Counter attack is just how it is said COUNTER ATTACK.

G.) Title – it is the name above your players head. This is somehow important too because titles give a player an added stats. It can be movement speed bonus, crit rate, crit dmg increase or whatever you desire. This can be obtained by using guidebooks or from events or exchanging Ignate title coupon to Ignate.

H.) Ping – this is very important, it doesn’t matter how strong your gears are or how good you are in PvP because if you have latency issues then you will have the hardest way of winning. Winning is pretty much impossible if you have high Ping. Here is the link to a website that will allow you to view your Ping:

—>>http://pingtest.net

I.) Guard dash – Why do you ask? this is quite difficult to pull of because you must be very versatile and adaptive because you have to use TAB to use your shield. Using Guard dash allows you to launch an opponent in midair so its like breaking his guard. This is possible but seriously difficult to pull-off. Here is a good video showcasing how to use a guardian in PvP. He was also able to use Guard dash Launching the enemy and the air and then followed up by kick launchers. :D

—>>http://www.youtube.com/watch?v=KsQegu9M6DU

J.) Pets – almost forgot about this one. This is very important because you can use pets inside PvP. :D There are a lot of pets that boosts your damage, accuracy, evasion and other stats as well. You can also use pets skills and stack them with each other for better results! Here is a chart for some of the pets that can stack together:

http://i291.photobucket.com/albums/ll284/SaviorSephiroth94/PetBuffs.jpg

III. Skills

(In this section you will be educated of skills that is/are important in PvP.)
Note: That [SLOW/NORMAL/FAST] means how long the animation is.

A.) Flame Kick – [FAST] Short-ranged 1 hit that launches your opponent to the air.

B.) Crescent Kick – [SEMI-FAST] Short-ranged 1 hit that launches your opponent to the air, but for some reason this is somehow only possible if you have a decent damage. This can also be used when you are evading or jumping into a platform or hard to reach places, it is a good skill that can be stack with Dragon Kick that gives an extra height to your jump.

C.) Dragon Kick – [FAST] Short-ranged 3 hits that can only be used whilst in midair/airborne. As I stated before you are invulnerable when using this skill, nothing can cancel this skill as well.

D.) Aero Boom – [FAST] Long-ranged 3 hits that sometimes inflict knockbacks that depends on the damage.

E.) Final Crash – [SLOW] Mid-ranged 3 hits that allows you to go behind an opponent WHILE doing damage.
These skills are your main skills, it all depends on you how you mix it up. Dealing Long-ranged attack to an opponent then charging in then doing a Short-ranged attack, then run/jump behind the opponent “Uppercut” using Crescent kick + dragon kick, punch skills this is one of the most obvious mix up and its effectiveness will depend on how it is performed. Notice that all the skills doesn’t have II on their name its only because II means it is stronger skill and it will all depend on you if you prefer on using it since somehow some skills are slower when it is II.

5th tier skill
This is limited and only for Lv.125+ and can only be bought by exchanging 5 SS5 skill to Ases at belos. You can either buy it from people at the market or Auction House @elias or get the SS5 skill scroll by killing monsters at midgard or 120+ monsters, they hand out skill scrolls that allows you to do 10 RANDOM quests in exchange for 1 SS5 skill coin. Unlike the other skills 5th skill uses AP not SP. :D

IV. Weapon & Armor

Choosing your equipment is important, because for some people who ignores Coli Armor/Weapon are ineffective in PvP. Picking a well enchanted Weapon or Haxing it is your best pick. All is either of the 5 listed below.

A.) NPC/Crafted weapon and armor – This is ideally one of the cheapest because you can obtain this from either the auction house, people and crafting. NPC equips are somehow good in PvP can have as much as 5 enchants on it, its pretty much color coded (Green = 1 enchant, Skyblue = 2 enchants, Orange = 3 enchants, Red = 4 enchants) the 5th enchant is Violet and it is a player’s pick of whatever he/she finds suitable on the armor/weapon.

B.) Blue named Weapon and armor – these are crafted as well or can be obtained by exchanging a Weak/Strong special weapon coupon to Toma. This is pretty much one of the best since Blue named Weapons/Armor has an added effect that an NPC weapon/armor couldn’t possibly have. Blue named armor can be obtained from bosses’. Ex. Time attack instance dungeon (TAID). TAID equips are known for its hax bonus stats that depends on its set number. Ex. Set 2. Def +, Set 3. Movement speed+, etc.

C.) Epic Weapon and armor – this can only be obtained by farming PvP points and exchanging to Lemyfor the desired weapon or armor. Note that Epic weapon lasts for 30 days and can be extended using Epic Extension Low/high that can be purchased from the Fashion shop using Astros while Epic armor is obtainable by either exchanging it using PvP points or exchanging an Epic armor coupon to Ignate. Note that an Epic armor obtained from Ignate has no Enchant on it, and enchanted epic armor can only be obtained by exchanging your PvP points although I’ve only seen a Skyblue enchant before so I guess it is possible to see 4 enchants on an exchanged Epic Armor. :D

D.) Valkyrie Knuckles – This must be somehow enchanted with min/max, Max dmg would be the priority. This can be difficult for you to have because this can be obtained by winning past LA TALE EVENTS and 1st place La deck.

E.) Divine Set – Is a class armor this can be obtain by crafting or buying it at people in Elias. Cheap and easy. It can have as much as 4 enchants just like NPC armor but without the set bonuses. :D

I recommend a Goblin Fist+9 enchanted with max damage atleast 40% max damage only because of its +20% crit damage and it’s availability. You can get this by exchanging Weak Special Weapon Coupon(WSWC) to Toma you can purchase WSWC from players selling it, auction house, and some event OGP have e.g. “gift box that you’ve done well”. OR PvP Ninja sharp claw, only because PvP weapons are made because for the purpose of PvP but this can be difficult to obtain since you need a lot of PvP points to get this. OR any Enchanted NPC weapon that has Min/Max atleast 40%. Armor is pretty much what you prefer, but Class armor would be the best pick because of the many options it could have (4 options).

Note:
*When upgrading and enchanting you must always consider the Durability of the equipment and the weapon.

*Functional sets bonuses does not apply in PvP simply because it is imbalanced e.g. Dragon Poe so as Special Cloaks e.g. Ishutaru wings.

*with all weapon and equipment mentioned accessories are important too. BINDI’s, EARRINGS and RINGS.
+Bindi = Tengu bindi for a little evasion or Valhala Crystal opt’ed for the additional overall stats.(your pick. both is good.)
+Earrings = Hell earrings for TDD, Guild earrings for more HP and SP +crit rate opt’ed with either LUCK or STA, Phoenix earrings for bonus overall stats +crit rate.
+RINGS = Hell earrings to set with the earrings that gives TDD, Guild ring with additional 300hp/300sp +crit rate and gives min dmg%.

Note:
If you are well funded it is important to use SUPER PUZZLES that can be obtain by having 1-5 & 6-10 SUPER PUZZLE and exchanging it to Toma. Also keep in mind of the following when it comes to enchanting these are your priorities:

HAT = STRENGTH & STAMINA or LUCK
TOP = STRENGTH & STAMINA or LUCK
BOTTOM = STRENGTH & STAMINA or LUCK
GLOVES = CRITICAL DAMAGE & PHYSICAL ACCURACY
SHOES = MOVEMENT SPEED atleast MS +45 & PHYSICAL EVASION *movement speed is VERY important because you will have to run most of the time to evade the opponents attacks and to distance yourself from very ranged classes.

Note:
Critical dmg is not the same in PvP.

100% critical damage = 30% in PvP
150% critical damage = 45% in PvP
200% critical damage = 60% in PvP

There is also a Rebalance Notes that allows players to find out the changes in PvP. Here is the link:

—>>http://latale.ogplanet.com/en/news/notice/4306.og

V. PROS and CONS

Pros:
1. Guardians are a melee class but we also have one of the longest range skills considering that we only use fist and kicks.

2. Base HP is monstrous we are probably one of the highest hp class in game.

3. Guardians are the best JAS’ers.

4. Guardians have great accuracy assuming that skill points are placed accordingly in the masteries.

5. Passive buffs and Active buffs are godly, Guardian has strength buff, hp buff, party buff that helps in survivability in PvP.

6. Can do multiple combinations of combos.

7. Fast animation skills on par with GS.

8. Dragon kick makes u immortal every time you use it, you can use it to dodge while attacking an opponent while he/she is using her best move that has slow animation.

9. Capable of doing multiple hits in midair.

10. We can KB in midair, we are considered one of the classes that can actually stun-lock.

Cons:
1. Doing combo with skills is easy but SP goes down so easy. :(

2. Normal and hard attacks are the somehow useless for its extremely short range.

3. We rely only on skills.

4. Not best for late reaction slow tapping players because playing Guardian is active and must always be moving around.

5. Guardians don’t have Area of Effect (AoE).

6. Most of Guardians skills can’t stun lock opponents (but it will be entirely different once you know the skill combinations).

7. Plain attack and hard attack cannot KB unlike other classes.

8. We don’t have skills that can heal.

SUMMARY

To summary everything I posted above. I say Guardian/Saint class is a formidable class in my own opinion, They have one of the most important stat in the game and that is HP. The difference of Guardian to a Templar in PvP is—Templar has Shield, shield can be enchanted by physical evasion. Templar also have a passive Target Defense Decrease that makes us Guardians a little less stronger than the usual. Templars also have skills that could really KB and lastly they can HEAL. :( But that doesn’t mean Templars are better. Yes they can enchant physical evasion BUT we have the Highest accuracy in the game. Templars has higher Defense because of the shield that they yield BUT they have to get close to actually hit us GUARDIANS while we can do long-range attacks and the HIT and RUN tactic. Templars are okay too but guardians can be really fun once you get the hang of it. :D

La Tale Guardian Guide Images


We also give random image about La Tale Guardian Guide hope you like this, we got this
images from arround the web .


La Sirene Botanika Blog: Guardian Angel Prayer

La Sirene Botanika Blog: Guardian Angel Prayer


Guide Pokemon pas cher avec la boutique Clubic

Guide Pokemon pas cher avec la boutique Clubic


Knight - ggFTW La Tale Wiki

Knight - ggFTW La Tale Wiki


image source :
  • wiki.ggftw.com

  • guidescroll.com

  • www.youtube.com
  • La Tale Knight PvP Guide

    Below is an article titled La Tale Knight PvP Guide that we collected from various sources. All credit goes to its original writer.

    La Tale Knight PvP Guide by shinymonkeys

    You have three options as a knight class; to either go as a knuckle, mace/shield, or a sword/shield knight.

    + Mace/Shield Knight or Sword/Shield Knight - if you choose any of the two here, keep in mind that you will do less damage since it’s harder to enchant high damage on 1 handed weapons because of the higher defense you receive from the shield rather than no defense from a 2 handed weapon

    + Knuckle Knight – as a knuckle knight, you use a knuckle (obviously) and it would be wise to get all the weapon skills and be as unpredictable as possible in PvP.  Since the most recent updates, any knuckle skill is able to KB someone as long as it hits damage so use this to your advantage.

    Stat Growth/Focus
    For the main part, Knights rely on their high stamina to withstand damage. Since they are a stamina class, the most important stat is stamina first, then luck. Resetting to stamina build using a stat powder increase (this can be obtained from the Stat Powder Coupon that Red Abio in Belos gives you once you hit 140) will give a large boost in base stamina; allowing knights to bulk up and increase their iron defense. Putting some luck on your armor is useful because without some luck enchants knights will be receiving major critical attacks; having low luck is disadvantage towards luck classes. As for shields, putting PDD puzzles or stamina is a good choice in order to reduce physical damage or gain some extra HP. For gloves you should either put Accuracy + Stamina or Accuracy + Critical, depending on your preferences of having more critical damage or having more stamina.

    Basic Techniques for any PvP classes:

    - Camp/Bait Method: If you just camp at a specific spot and let them chase after you, you can easily attack. rather than chasing after your opponent and messing up your skills or getting kb’d.
    - PvP skills: These skills are only usable in the PvP Arena and are obtained from Lemy, in Fight Arena.  By using specific amount of ely and fight arena points, you can get PvP skills that will further more improve your performance.
    - PvP UpperCut: A short range uppercut that attacks your enemy and lifts them up into the air.
    - PvP Back Dash: Evades an enemy’s attack by doing a long range back flip.
    - PvP Counter Attack: This skill can be used the moment your opponent kb’s you or lock you in place (doesn’t work if stunned/sleeped)

    Knight – Templar – Holy Order
    The mace/shield or sword/shield knight becomes a templar then a holy order, so if you believe that you rather prefer defense over attack, you should pick this as your 2nd/3rd job class. As mentioned above, you do less damage in exchange for defense.  Mace is higher damage, more range, but the slow skills make it easy to duck/avoid/cancel in PvP whereas using a sword sacrifices some damage and range for a faster attack speed. As a templar, your 1h weapon and shield skills increase, but when you get to holy order, that’s when things get easy in PvP. Also, for mace holy orders, luck increases the chances of the stun effect on the stun impact tree through crits. Best part in being a templar/holy order is that if you’re about to die, perfect shield and heal is awesome. Perfect shield lets you be invincible for a limited period of time and I hope I don’t have to explain what heal does..

    Mace Skills
    - Mystery Rod: This is a multi-hitter and low base damage per hit.  Version I (first version) hits 4 times, version II hits 5 times. This can be air skilled this to chase opponents.
    - Double Crasher: Hits two times moderate damage, longer range than attack hitbox shows (as in more range than the effect shown).
    - Serial Hits: Hits twice for high damage.
    - Crazy Hits: Holds self in place, version I hits high damage once, version II hits three times. You can chain them both one after another, followed by another skill to combo your opponent.
    - Stun Impact: Hits once for high damage, chance of stun on a critical.
    - Chaos Impact: Hits twice for moderate high damage, short range with a chance of stun on critical damage.
    - Giant Swing: This has a slow start up and hits once for really high damage with decent range.
    - Ruin Impact: Also with a slow start up, it hits twice for high damage; first hit has auto-cancel and launch, decent range
    - Shield Crash: Stuns for 5 seconds. You should follow this up with your most strongest skills.
    - Power Slam: Has high damage, always interrupts your opponent’s combos, cracks and launches the enemy in the air.
    - 5th tier skill: This isn’t really good because it takes a while for the last hit to deal damage and is easily countered

    + Suggested Weapons: Goblin Mace for TDD (target defense decrease), Vintor Mace for slow, or Knight Heavy Hammer for more HP

    Sword Skills
    - Holy Symbol: Four hit attack, like all deadly skills it stuns enemies
    in place for the duration of the attack while dealing high damage.
    - Break: Quick single strike attack. Version II hits harder on the opponent.
    - W. Break: Just like break but hits twice. Version II hits harder.
    - Sonic Blade: A single-hit crashing down move with medium-high horizontal range but little vertical range.  Version II is a 3 hit attack with same range
    - Death Blow: This is a quick forward stab, not very flashy. Medium horizontal range.  Version II is a quick two hit stabbing attack with high range
    - Bamboo Cutter: A very fast low damage attack; very low range.  It slashes 1 bamboo shoot in a vertical fashion.  Version II adds a “flash” effect and slices 3 bamboo shoots instead of 1 or 2. It’s range is double that of Bamboo Cutter I.
    - Dragon Tail: A spinning attack that hits on both sides, rather low range on both sides.  Version II adds more “mist” effects and range is extended from short to mid range. The range that hits behind you is still less than in front, but is still greatly increased.
    - Rising Crash: An upward slash with short range.  Version II is a rising upward slash and the attack effects are now red and include a large amount of red mist that gathers at the point of impact (seen when graphic effects are on).
    - Rapid Hack: An upward slice and then a spinning slash.  For this skill’s version II, the effect is larger and brighter compared to its predecessor. Range is SLIGHTLY longer than the original making this skill’s range just barely hit the edge of the screen.
    - Rune Stride: Your character points forward and a large sword falls from the sky upon your enemies.  The first hit is weaker than the other 3 but it holds enemies in place (regardless of damage done) for the next three hits. It has a medium-high vertical range, medium horizontal range.
    - Shield Crash: Same for a sword, it stuns the opponent and deals some damage as well.

    + Suggested Weapons: Valkyrie Sword, Bogle Sword

    What about the Uga Uga Axe?
    Using an uga uga axe can be viable for mace given it will crit more but in PvP, against only a specific amount of moving opponents, it is not wise to use it just to have the activation effect because it takes a while for the effect to activate due to the fact that you’re not up against a mob of monsters.

    Knight – Guardian – Saint
    For people who like speed, range and kbing their opponents, this is the class to switch to at level 80.  When you advance to guardian, you only have version II of your skills.  These II skills have high damage and additional attack properties like launching, stun, etc.  As mentioned above, ALL your skills KB (knock back your opponent) unless you miss, I guess.  As a knuckle user, in my opinion, it would be best to get two skill trees to play with until you’re really familiar with them. But for high level pvp play, it’s highly recommended you get all three skill trees as that broadens your options in a battle.  There are three trees for a knuckle user; a kick tree, a punch/jab tree, and a range tree.  It is recommended that if you ever decide to reskill your character to have the same skills under a specific tree.

    - Flame Kick: Basic launching attack. Use this to start combos or if your latency/reaction is fast enough, you can airskill this after uppercut to continue an air combo. You can also interrupt someone’s airskill if you’re fast enough.
    - Wind Kick: Quick triple kick combo. Short range but decent damage. A decent move to follow up a Flame Kick.
    - Cres. Kick: Upward hitting spinning kick that launches your opponent in the air. Follow flame kick with this move to faceplant your opponent, allowing you to follow up with a wakeup skill.
    - Dragon Kick: Aerial kick attack. Hits three times for heavy damage. This is Guardian/Saint’s strongest skill. There’s plenty of ways to use this, such as approaching, following up an uppercut-> crescent kick, or escaping from a bad situation. This attack’s also difficult to cancel so it’s a safe approach in many cases.
    - Sonic Boom: Basic ranged attack. Hits one time, and usually fairly safe to use because of its quick execution.
    - Aero Boom: Easily one of the most useful skills for Guardian/Saint. Hits three times for decent damage with long range. A great attack to time on wakeup (this is when they get up after you knock your opponent down).
    - Energy Boom: Just like Sonic Boom, but with a longer startup and higher damage. Not as safe nor easy to use, I’d say this attack’s better for zoning.
    - Final Crash: Launches your character’s body forward and hits opponents in its path. About a 2/3rds of the range of sonic boom. The guardian version is slow and low damage so it’s usually not adviable to use this, however it gets a lot faster and gains additional hits when you promote to Saint.
    - The Fist: Hits once in front of you, slight chargeup time.
    - Hell Fist: Longer ranged version of The Fist.  This punch skill is probably the one with the longest range in the punch/jab tree. Saint version gains an additional hit.
    - Chulsango: Slow startup shoulder rush, but really high single damage output. Saint version has a chance of stunning. It’s not advisable to use this on the ground at all. Airskilling this is a much safer, reliable way of landing this skill.
    - Twin Fist: Similar to Hell Fist, this attack does heavy single hit damage and launches your opponent in the air, allowing for many followup options.

    Note: for each individual tree, the combos can be used faster. (ie, you can directly go into Sonic Boom after Aero Boom with less delay than if you go into the fist after Aero Boom because there is lag time between usage of different tree skills)

    Pros and Cons
    Holy Order
    Pro
    - high stam/HP/Def
    - full HP healing
    - stun attacks
    - invincibility for certain periods of time
    Con
    - poor range
    - poor speed
    - atrocious luck (as in the stat ability luck) distribution that results in the inability to deal critical damage often
    - runs out of SP quickly (skills use SP)
    - most of their skills are easy to avoid

    Saint
    Pro
    - high stamina/HP/Def
    - moderate damage
    - high accuracy
    - hard to hit/predict due to the many variations in skills
    - stun attack has 8 second CD, which is quite nice
    - useful skills with mid to short range
    Con
    - atrocious luck (same as holy order con; see above for details)
    - hard to handle due to many skills
    - runs out of SP quick
    - complicated UI set up (Must be good at switching from F1 to F2); due to the massive amount of weapon skills and extra buffs, all those skills take up more than just one quick slot

    +++Suggested Armor: Sacred Set, TAID Set+++

    Knights can also get epic set but they require tons of PvP points. While there are epic armor coupons out there, getting a good base can only be obtainable with PvP points considering the pieces from the coupon are clean.  Also, the set buffs for the epic set pale in comparison to the Sacred Set bonuses.  For example, epic set has a set bonus of 10% rope movement speed which is basically useless because there are no ropes in an official PvP match that is fought by being qued in Fight Arena (at Lemy).

    The Sacred Set can be worn at level 131+, so if you’re still a knight or not quite at that level yet, it is also recommended to get the Divine Set (level 80+ class set).  Although I said that, the Divine Set > Sacred Set until Sacred is either +1 or +2.  The set bonuses  (mainly the defence boost) from divine makes its stats = 140 armor.  It takes ores, class upgrade scrolls, and upgrade capsules to upgrade class sets.  When a class set piece is upgraded, it’s level increases by 10, so don’t try to upgrade the armor higher than what you are.

    La Tale Knight PvP Guide Images


    We also give random image about La Tale Knight PvP Guide hope you like this, we got this
    images from arround the web .


    La Tale Phantom Mage PvP Guide | GuideScroll

    La Tale Phantom Mage PvP Guide | GuideScroll


    La Tale Phantom Mage PvP Guide | GuideScroll

    La Tale Phantom Mage PvP Guide | GuideScroll


    Learn and talk about Elemental Masters, American fantasy novel series

    Learn and talk about Elemental Masters, American fantasy novel series


    image source :
  • guidescroll.com

  • nforum.ogplanet.com

  • www.youtube.com
  • Hunter Blade Comprehensive Guide

    Below is an article titled Hunter Blade Comprehensive Guide that we collected from various sources. All credit goes to its original writer.

    Hunter Blade Comprehensive Guide by Tnargraef

    Table of Contents
    Section 1: Getting Started
    Section 2: Weapons & Armor
    Section 3: Weapon Mastery
    Section 4: Items
    Section 5: Families and Clans
    Section 6: Hunting
    Section 7: Reputation
    Section 8: Player vs Player
    Section 9: Cool things you didn’t know

    Section 1: Getting Started

    Now if you’ve started up the game and logged in you’re at a screen with a few empty boxes. Clicking on one of these boxes will allow you to customize the looks of your character. Take the time to make them look like you want, as you’ll be stuck with that!

    After you dress your character up how you like you can choose what sort of weapon you would like to start with. This choice is just what you start with, not what you will stuck with the whole game, but if you do want to keep using that weapon type then all the more to you. Your selection will be of two types of armor types and three weapons. You have the Wand with Light Armor or the Sword and Shield and Sword/Longsword/Katana with Heavy Armor. There are more weapons available, but in order to use them you have to get to higher levels as they are not unlocked to use until then.

    Once you’ve chosen both of those you’re almost done. You select a line, which is a room in the server essentially, and you’ll be taken to the tutorial where you will be trained on weapon use. After completing the tutorial, which is pretty easy because you’re an awesome player, you’ll take your first steps into the hunter blade world. Congratulations and welcome to the new hunting world!

    Section 2: Weapons & Armor

    There are a variety of weapons in hunter blade made for different styles of play. As long as you posses the level you can wield any weapon. With that being said you won’t see some weapons until the level forties. It’s always good to try new things until you find the play style that fits you. Some days you might want to be the guy with the giant sword and other days you might want to be the guy with the gun. Play how you want and find what fits for you.

    Eventually when you get to level twenty you will gain access to specializing in the weapon you enjoy using called Masteries. You can still use all weapon types, but Masteries provide you with bonuses to specific weapon types. I will cover Masteries in another section, but for now on to weapons!

    Heavy Armor Weapon Types:

    Sword

    Available at level 1.

    This is the long blade of the game. It is quicker than some of the other large weapons, but lacks in the same amount of raw power. It makes up for this by wide, fast swings and a focus bar of energy. The focus bar is filled with every hit that makes a connection to a beast and slowly degrades over time. When the focus bar is full, it increases the users attack power for a small duration. The other main purpose of the focus bar is to allow the user to perform powerful focus based attacks, although, these attacks deplete focus.. The Sword’s only defensive ability is like all other weapons the dodge roll.

    Sword and Shield.

    Available at level 1.

    The sword is a weapon made for war and the shield is a weapon made for defense. When used together they create awesome synergy. SnS, the shorthand for sword and shield, is referred to as 1h sword in the game. One of the best things about the SnS is the ability to block and dodge. Blocking should be the last resort if you can’t get away as currently it takes a large amount of stamina, but another way around the problem is to drink Fit Potions to give yourself unlimited stamina or purchase the Luxurious Guan set from the cash shop. The SnS is a great starter weapon for everyone to use to get used to avoiding attacks and continues to be a great all around defensively built weapon type.

    Dual Sabres

    Available at level 30.

    Dual Sabres DS or Dual Swords as they are, are a highly offensive weapon set. They combine a high speed attacks with reckless abandon. DS are a short range weapon with the ability to enter a state of wrath increasing the power and damage of their attacks. They lack defensive postures aside from the normal dodge roll like all weapons, but usually they deal enough damage to make quick work of any target.

    Chain Hammer

    Available at level 30.

    Chain Hammers are an interesting weapon. They have the ability to be in melee, but also stay at a range. They allow the user to be quite versatile in comparison to many of the other weapon types. They do have the disadvantage of moving slower, but their raw power tends to make up for this. While spears are a large power house, they lack the ability to block and rely on dodging to avoid attacks. Their ability to perform a strong attack from a distance tends to fix this.

    Claymore

    Available at level 40

    The Claymore is the biggest, heaviest, cutting weapon in the game. It has a huge amount of raw power, but suffers from being the slowest weapon when not sheathed to your back. It makes up for this with wide swings to cover areas and the ability to block. The Claymore also has the ability to charge attacks making it great for taking advantage of vulnerable beasts.

    Light Armor Weapon Types

    Wand

    Available at level 1.

    Wands are unique weapon type. They provide buffs to other players in the party, but not the user themselves as well as have the versatility to cast spells as it were. Each Wand has different buffs with different levels of the buff. One of the more useful abilities of the Wand is to create a shield that blocks ranged attacks from hitting the user. The Mastery of Wands allows them to cast amazing abilities, but that will be detailed later. An interesting ability that some Wands have is to transfer health from the user to other party members. The ability to heal can sometimes be sought after as a great tool for any party. The Wand also suffers from having only the ability to dodge not block.

    Crossbow

    Available at level 40.

    This is the ranged damage king currently. The Xbow, shorthand of Crossbow in game, has the longest distance of any weapon. You can rapidly fire bolts at any target and the distance makes the fact you’re wearing light armor a non-issue. Xbow users have to be careful with ammunition though. Each bow has a magazine and once that magazine is expended if the user fires again it will cause an animation where the character checks to find out they have no bolts. That animation is the bane of many gutsy Xbow users causing deaths many times over. If you remain stationary while firing your rate of fire will increase. Like many weapons the only defense that the Xbow has is dodging.

    Weapon and Armor Refinement

    Refinement is the process to improving your weapons and armor. To refine your equipment you talk to the Weapon forger for weapons and Armor forger for armor. You then select the refinement option under their choices. To refine armor you must unequip it first, but for weapons you can just refine the one you are wearing or place the weapon you want to refine in the box for refinement. For armor you will need an additional item known as Rockstone and for weapons you will require Bladestone. Both types of stone have a level range.

    In the top right of the refinement window you will see the chance that the refinement will succeed. If the refinement succeeds then the item will increase in level. If the refinement fails it can do several things.
    The first thing that could happen is nothing. The item would remain at its current value with no change of stats.
    The second that could happen if the refinement fails is it could lower the level of the item, which could be anywhere from one to three.
    The third and final thing that could happen is that the item could be dropped back down the the safe zone. This means it will lose all it’s bonus and drop to +0 or +6 if you reached that point.
    To provide a better chance at success there is a third item called “Lucky Items”. Most Lucky Items are purchased through the cash shop, obtained from completing hunts on challenge difficulty or even just being really lucky opening a gold box in a hunt. Some will increase success and some will simply help prevent level loss.
    As you increase the level of an item the success rate goes down. It is very important to note that you are not always guaranteed success and the only control that the player has themselves is using lucky items. If you are worried about having to spend hundreds of gold upgrading an item make sure to try and use lucky items. The forgers can be found in Village1 and Village2.

    Quality Improvement.

    By sheer luck you can get these items called Spars when finishing a hunt. There is a spar for each slot of equipment that a player has. Spars are used to increase equipment’s quality. Improving the quality of a piece of equipment improves its overall attributes. Spars are also like Blade/Rockstones as they also have a certain level range that they work on as well. Each spar has a different level in which it increases equipment. A 1 Star Spar increases the equipment to 1 step higher for its level range, but in order to reach step 2 and two stars you will have to find a 2 star spar for that level. As always talk to the Armor forger to improve armor and Weapon Forger to improve weapons.

    Runes

    Almost every piece of equipment has a energy value. This value can be increased by the usage of energy stones. Energy stones can be purchased through Clan Dedication Medal exchange or by again being very lucky opening boxes during hunts. The main purpose of energy is it allows a certain number of runes to be placed into armor or weapons. Runes enhancement equipment even more. All runes have a favorite slot where they give a bonus to in addition to their normal effect. Runes can be refined in the same manner that other equipment is refined to increase their power. To equip runes into your equipment, refine runes, or create runes you need to speak to the Rune Traders found in Village1 and Village2.

    Rare Weapon Improvement

    Just a small note about any of the HuntSoul/HuntElf weapons that are rare rewards from doing hunts: They can not be improved by any means. More information on how to obtain these will be covered later

    Fashion

    Fashion items are normally purchased through the Cash Shop, which can be accessed by pressing “F” once you’re in game, and give you a way to dress your character in the manner you desire. Fashion items also provide small benefits if you equip the set of them. You can show fashion over your armor or if you just want the fashion set bonuses you can show your armor over fashion. There are sets of fashion that cover all slots of fashion that provide an overall bonus instead of being multiple pieces. Wing fashion items are displayed in town, but not on hunts. You can purchase permanent or rent fashion items using Jade Shells, but you can only rent fashion items using tickets obtained through in game events.

    Section 3: Weapon Mastery

    A unique quality of Hunter Blade is that you are given the option to change to any weapon type you want. You can use all the basic abilities of all the weapon types, but you are given the option to specialize into weapons. Starting at level 20 you can choose a Weapon Mastery and at level 40 you get a second. When you reach level 65 you can participate in the Jade Crown Dragon Event for a chance to receive a Battle Scroll cash shop item, worth 3000 jade shells mind you, and learn your third Mastery.

    Choosing a Mastery gives you benefits with that weapon as long as you wield it and gives you some unique abilities to use fighting beasts and players. Once you choose a Mastery you can’t unlearn it unless you have a special item called Scyhata Fruit or 3000 Jade Shell. Once points are set if you need to reset them you will need an item called Viper Fruit or 1000 jade shell. Both items are purchasable from the Cash Shop and obtainable from special rewards at the end of the hunt.

    To use your abilities from Mastery you must put skill points, which are earned almost every level, into the Mastery skill of the weapon that is located in the top left of the skill menu, which you can open in game using P. Once you have points into that ability you can spend points into the other abilities in the tree. As skill gain levels they will require a higher Mastery of the weapon to improve them further. You can add points to the Weapon Mastery Ability every 10 levels starting at 20.

    There are passive abilities, self buffs, and active skills. Passive abilities are marked with a blue background and increase certain attributes of the player with their rank. Self Buffs provide the player with special statuses to aid the player in hunts or PvP and have a gold background. Active Skills have a red background and allow the player to perform special maneuvers with an array of effects. To use most Self Buff or Active Skills you have to click and drag them down from the Skill book to your hotbar at the bottom of the screen.

    Sword

    Tier 1: Available at level 20

    Sword Mastery
    Passive Skill
    Description: Requirement for learning other Sword Skills

    Sword and Shield

    Tier 1: Available at level 20

    Sword and Shield Mastery
    Passive Skill
    Description: Requirement for learning other Sword and Shield Skills

    Wand

    Tier 1: Available at level 20

    Wand Mastery
    Passive Skill
    Description: Requirement for learning other Wand Skills

    Dual Sabres

    Tier 1: Available at level 20

    Dual Sabre Mastery
    Passive Skill
    Description: Requirement for learning other Dual Sabre Skills

    Chain Hammer

    Tier 1: Available at level 20

    Chain Hammer Mastery
    Passive Skill
    Description: Requirement for learning other Chain Hammer Skills

    Claymore

    Tier 1: Available at level 20

    Claymore Mastery
    Passive Skill
    Description: Requirement for learning other Claymore Skills

    Crossbow

    Tier 1: Available at level 20

    Crossbow Mastery
    Passive Skill
    Description: Requirement for learning other Crossbow Skills

    Section 4: Items

    There are dozens of types of items in the game that have various purposes. They fall mainly into two categories:

    Consumables: These include potions, buff pills, traps, and bombs.
    Crafting Parts: The items used for crafting equipment or for item synthesis.

    Usable items are your main way of doing things on a hunt. For melee users this means things like sharpening stones to keep their weapons sharp or like the drinks that all hunters will use to stay warm in cold areas.
    Parts are the things that will clutter much of your storage. Parts come from carving parts off beasts or gathering from the gather zones. Parts will be used in crafting armors, weapons and in the synthesis of items. The rare parts of beasts that you carve from them have a higher chance of dropping in higher difficulties.

    Commonly Used Items

    Sharpening Stones: This is used when a weapon’s sharpness decreases to increase it again.
    Hot Drink: Prevents cold areas from draining stamina.
    Cold Drink: Prevents the loss of HP in hot areas.
    Potions: Restores HP.
    Vitality Drink: Restores Stamina
    Life Elixir: Raises HP above the normal 1000 limit.
    Master Key: Allows the Player to open a gold reward box from the hunt regardless of score.
    Super Lucky Sand: Increases the Success rate of Refinement
    Protecting Sand: Reduces the chance of level loss during Refinement
    Glimmer Sand: Increases the Success rate and lowers the chance of level loss during Refinement
    Warmth Sand: Reduces the chance of level loss during Refinement

    Carving

    Carving is easy and most hunt related of all the gathering types. All you have to do for carving is kill a beast and then walk up and press Z. When you do you’ll gather the materials from their corpse. You’ll often need these materials for Armor and Weapon Crafting.

    Gathering

    The gather zones can be accessed at level 20. You can talk to Rebecca in Village 1 and Rachel in Village 2 to enter the zones. To gather you will need to get Gather Boxes which can be claimed from Rachel or Rebecca. Depending on your level you will receive a different number of boxes. The higher level you are the more boxes you will get.

    When you try and enter the sites you will notice that there are several sites divided by skill level. The skill level cap is determined by your level times 10. In example a level 20 character would have a skill cap of 200 where and level 70 character has a skill cap of 700.

    Upon entering the site there are three zones of materials: Insects, Minerals, and Plants. Each area will have nodes that you can gather from. The nodes will deplete after a certain number of materials have been gathered from them and later will respawn after a certain amount of time. It is important to note that each line has a different collecting site so if all your nodes on one line are down you can move to another to continue collecting.

    When you are trying to collect from a node it will look similar to this:

    Small Stone
    Iron Ore
    Adventurine

    What this means is that the Common drop from the node is small stone, the Uncommon drop is Iron Ore and the Lucky drop is Adventurine. You will gather the common and uncommon drops automatically, but the Lucky drops will bring up a pop-up that you will have to click to claim the reward. If there is a particular item you wish to gather a lot of normally it will have to be the Uncommon drop, unless you want the common item from the node.

    For a helpful listing on what items can be gathered from the collection site please see:
    Collection Site Drop List

    Storage

    Your main form of storage will be your warehouse box found in Village 1 and Village 2 areas. The warehouse can be expanded by spending Jade Shells. Your other form of storage is your backpack which is also expanded by using Jade Shells. It is cheaper to expand your warehouse than your backpack.

    Synthesis

    Synthesis is the process of turning items into something else. You can access the Synthesis menu by pressing N or clicking the button on the menu bar. Synthesis is a skill like gathering, but it requires synthesizing items to gain skillups. What you can make is dependent on your skill level, but the higher your skill the higher items you can create. When you click an item on the list it will show you the skill required for the creation and the amount of items required for the synthesizing. When you are ready to craft you can click the crafting item in the lower right to start the crafting. On the right side of the box you will see the synthesizing amount that you can enter the amount of items that you wish to create.

    There are three main types of Synthesis:

    Elixir Potion: The synthesis of restorative and buff potions for use in hunts.
    Hunting Item: The synthesis of items to assist in the hunt like traps and sharpening stones.
    Refined Item: The  synthesis of items required for armor and weapon refinement.

    Mastery

    When a player reaches level 70 they can perform a series of quests for their Gather Mastery and another series of quests for their Synthesis Mastery. Gather Mastery allows the player to collect rare materials from the Master Gather site that could not be collected otherwise. Synthesis Mastery allows the player to synthesize items that can not be made without the Mastery.

    Gather Masteries
    Mineral: Allows the gathering of rare minerals.
    Insect: Allows the gathering of rare insects.
    Plant: Allows the gathering of rare herbs

    Synthesis Masteries
    Elixir Potions: Allows the creation of above average potions
    Hunting Item: Allows the creation of hunting items that work on level 70 beasts and above.
    Refined Item: Allows the creation of appraisal scrolls for identifying rare scrolls found in difficult hunts.

    Cash Shop

    The cash shop is where players can spend their Jade Shells to purchase an amazing amount of items. Jade Shells are purchased through the main site (this link http://billing.beeboomonline.com/ ) for use in the in game shop. The Cash Shop can be accessed by pressing F or by clicking the shop option from the menu buttons at the bottom of the screen. The Cash shop has many tabs for sorting items:

    Item Shop:
    These items are purchased with Jade Shells.

    Hot Sales: Items that are very popular.
    Medicine: Items that heal or buff the player in Combat.
    Refined Item: Items used in refinement.
    Fashion: Items used for the Fashion equipment slots of characters.
    Mount: Mounts for faster travel.
    Ornaments: Decoration slots for the characters.
    All: Displays all the items in the Item Shop.
    Receive: Special items for that can be claimed by reaching certain requirements.

    Ticket Shop:
    Tickets can be earned from winning in Leisure PvP modes and claiming them from the chest after victory.
    Hot Sales: Items that are very popular.
    Medicine: Items that heal or buff the player in Combat.
    Refined Item: Items used in refinement.
    Fashion: Items used for the Fashion equipment slots of characters.
    Mount: Mounts for faster travel.
    Ornaments: Decoration slots for the characters.
    All: Displays all the items in the Ticket Shop.

    VIP:
    The VIP shop is currently quite bare aside from the items that can be claimed from the Receive tab in the Item shop.
    Hot Sales: Items that are very popular.
    Medicine: Items that heal or buff the player in Combat.
    Refined Item: Items used in refinement.
    Fashion: Items used for the Fashion equipment slots of characters.
    Mount: Mounts for faster travel.
    Ornaments: Decoraction slots for the characters.
    All: Displays all the items in the VIP Shop.

    VIP status can be purchased for Jade shells. There are three versions of the status:

    VIP 1: Allows the hunter to claim a single Hunter Pack, several Route Flutes from Bunny everyday and see enemy HP without using a Sense Elixir. Also grants the player 3% self experience bonus, the Fashion Set – Swift Hunter and 4 weekly fatigue scrolls (500 fatigue). Costs 1200 Jade Shells and lasts 30 Days.

    VIP 2: Allows the hunter to claim a two Hunter Packs and several Route Flutes from Bunny everyday and see enemy HP without using a Sense Elixir. Also grants the player 6% self experience bonus, 3% team mates experience bonus, the Fashion Set – Dominating Hunter, 4 weekly fatigue scrolls (800 fatigue), and increases the family collecting quest loops by 2.Costs 2400 Jade Shells and lasts 30 Days.

    VIP 3: Allows the hunter to claim a Three Hunter Packs and several Route Flutes from Bunny everyday and see enemy HP without using a Sense Elixir. Also grants the player 10% self experience bonus, 6% team mates experience bonus, 4 weekly fatigue scrolls (1000 fatigue), and increases the family collecting quest loops by 3.Requires the player to spend 30000 Jade Shells and lasts 30 Days.

    If a player remains online with VIP status for 240 hours then they will receive one month of VIP 1 Status. VIP status gained by spending 240 hours online can only be claimed once a month.

    Hunting Packs are a interesting item that allows players 4 options when hunting. Each option consumes 1 Hunter’s Pack and can only be used during a hunt.:
    Ctrl 1: Instantly restores 2000 HP. 60 Second cooldown.
    Ctrl 2: Instantly restores weapons to Max Sharp. 60 Second cooldown.
    Ctrl 3: Instantly increases the player’s stamina to 150. 30 Second Cooldown.
    Ctrl 4: Instantly gives the player the Hot/Cold drink buffs. 10 Second Cooldown.

    Section 5: Families and Clans

    Familes and Clans are the social groups of the game. Families are what everyone starts in for working together to make something big. Eventually Clans form from a family and can adopt other families into the Clan. Overall working together is the main point of Clans and Families and later down the line it will be possible to fight other Clans for supremacy on the Clan Rankings.

    Families

    How to create a Family

    Family Benefits

    Aside from being able to talk with your friends if they’re on a hunt or on another line, Families provide the players with some unique rewards. Every day the players can claim a Revival Coinpack, reward fatigue after they have spent some of their fatigue daily, and Fatigue Potions can be claimed from the Family Admin as well. The Admin also offers unique potions and runes that can be purchased using Family Contribution.

    Family Contribution

    Family Contribution is a currency used to buy things, but it is also what keeps a family active and going. There are two kinds of Contribution:

    Personal: This kind of Contribution is spent on the family rewards that you can purchase from the family admin. It can also be converted into Clan Contribution.
    Overall: This kind of Contribution is equal to the amount that each member makes. Overall Contribution is spent on creating Family Resources, leveling the Family Farm, leveling the Family Workers, and maintaining the activeness of the Family.

    Every day the family will lose Contribution. The amount lost is based on the Family Activity. If the Family is unable to pay it’s activity cost then it will be disbanded (Still need to verify if it de-levels or disbands a family with a level higher than 1). Every time a member performs either the Family Daily Gathering quest or a Cohesion Medal quest it adds experience to the Family. When the Family fills their XP bar they can level up. Leveling the Family up allows for more workers on the farm, higher farm levels, and more members. This comes at a cost of requiring higher amounts of activity deducted each day. It is very important that all members participate in getting activity to help their Family and later their Clan to grow.

    Family Farm

    The purpose of the Family Farm is to collect resources. These resources will then in turn be used to create and upgrade portions of the Clan Scene. In order to use the Family Farm the Family Patriarch has to complete a quest. Upon completion of this quest the Family Patriarch and Vice-Patriarchs will be able to speak to the Family Admin in Village 3 on producing resources. When they speak to the admin can view the production of resources and choose which type of resource they want to produce, what level of resource to produce and which worker they want to use to produce it. Each level of resource requires a worker of equal skill to produce and leveling the workers is done from the Family interface.

    Current Resource Types: Plants, Minerals, Insects
    Level 1 – time 360min – output 100 – consumes 398 contribution
    Level 2 – time 450min – output 136 – consumes 1536 contribution
    Level 3 – time 540min – output 184 – consumes 3023 contribution
    Level 4 – time 630min – output 250 – consumes 4865 contribution
    Level 5 – time 720min – output 338 – consumes 7056 contribution

    Farm Worker upgrade:
    Level 1 – consumes 54 contribution
    Level 2 – consumes 362 contribution
    Level 3 – consumes 954 contribution
    Level 4 – consumes 1864 contribution
    Level 5 – consumes 3122 contribution

    Cohesion Medals

    There are two family events during the day that allow the player to acquire the quests for Cohesion Medals. The quests can be picked up as many times as needed during the event time, but can’t be picked up outside that time. Each time the player completes one of these quests they will receive:

    At level 55 1 Medal, 100 Family Contribution, and 15 bound Silver Shells.
    At level 65 1 Medal, 200 Family Contribution, and 25 bound Silver Shells.

    When 200 Medals are gathered the Family Patriarch/Matriarch can turn them in at the Family Admin to open a special prize for the Family during the day. When the quest is turned in you can collect the gift until server reset in the morning. To collect your gift you have only to talk to the Family Admin and select the option to do so. When you open the gift you will receive 2 bound Gold Shells, a 500 Fatigue Family Energy Scroll and on occasion a Raw FLA Rune.

    Clans

    How to create a Clan

    Clan Benefits

    Clan Salary based on Totem Level
    Dedication Medals for the top 3 Ranked Clans
    Clan Shop providing various goods based on Totem Level
    Overall sense of Awesomeness

    Clan Contribution

    Clan Contribution is very similar to Family Contribution. It is used in upgrading parts of the Clan, but unlike a Family a Clan does not have a daily cost. There are two types of Clan Contribution as well:

    Personal: Personal Contribution is used by the Clan members to purchase items from the Clan shop. Personal Contribution can be earned by trading Family Contribution in, which does not add to the Overall Clan Contribution, and by doing the Clan daily, which does add to the Overall Clan Contribution.
    Overall: Overall Contribution is used in building in the Clan Scene. Clan Contribution is only earned by Clan Members doing the Clan Daily.

    It is important that if you are part of a Clan that you are doing your Clan Dailies. The Clan Dailies directly affect the growth of your Clan. If you want your Clan to grow and reach being one of the top Clans earning Dedication Medals get them done!

    Clan Scene

    Most buildings have no effect until leveled past one. Which buildings exactly is still being confirmed.

    Clan Totem
    Affects Clan Salary and provides a buff to the Clan Scene depending on the type of totem in Clan Battle.

    Beast Totem:
    Technology Totem:
    Attack Totem:
    Defense Totem:

    Clan Shop
    Provides various wares based on Equipment research Institute, Clan totem, and its own level.

    Clan Warehouse
    (Not implemented)
    Clan Stable
    Home of the Clan’s Beast
    (Not implemented)
    Archery Tower
    (Not implemented)
    Equipment Research Center
    Adds items to the Clan Shop
    (Not implemented)
    Refinement Research Center
    Reduces the costs of refinement.
    (Not implemented)
    Insect Research Center
    Increases production of Insects on the Family Farm of Clan Families.
    (Not implemented)
    Mineral Research Center
    Increases production of Minerals on the Family Farm of Clan Families.
    (Not implemented)
    Plant Research Center
    Increases production of Plants on the Family Farm of Clan Families.
    (Not implemented)
    Clan Battle
    Not implemented yet

    Section 6: Hunting

    Beasts are the main thing you actually fight in Hunter Blade. They come in a variety of shapes, sizes and hunger for human flesh. You can fight them alone or fight them in groups, but you will have to fight them to become a Master Hunter.

    Preparation

    It is ill advised to walk into a hunt without preparation. There are many items that you can take on a hunt to make your job easier than what it normally is. Here are a list of a few things you should consider bringing along:

    HP Potions: There is always a Chance you could get hit and having something to restore that damage makes it less likely you will have to use a coin to revive yourself.
    Vitality Potions: Your Vitality is what allows you to roll out of the way or move quickly out of the line of fire. The max without using certain items is 150. Vitality slowly decreases over time so to make sure you have some when you need to avoid something that could kill you is quite important.
    Sharpening Stones: Weapon Sharp determines how much damage you actually do to a target by a percentage. If the weapon sharp drops below into the chipped or red status you actually deal less than normal damage. For people that use melee weapons it’s important to bring something along to keep up the weapon’s damage.
    Cold Drink: When you enter a hot area your HP will slowly start to decrease. To counter this you drink one of these and it will prevent the loss of HP for the duration of the drink. Desert and Volcano require Cold Drinks in many of the areas in them.
    Hot Drink: When you enter a cold area your Vitality will be quickly drained away. To counter this you drink one of these and it will change the Vitality loss back to its normal rate. The Snowy Mountains require Hot Drinks in many of the areas in them.

    Difficulty

    When you try and enter a hunt you’ll notice that there are 4 Difficulty types:

    Simple: The easiest of all hunts. Hunt objectives must be completed. Large Beasts normally come with a single health bar. Supplies are provided.
    Normal: A bit harder than simple. Hunt objectives must be completed. Large Beasts normally come with 3 Health bars. Supplies are provided, but you get less than Simple.
    D-Index: Harder than normal. Hunt objectives must be completed. You get even less supplies than Normal and Large Beasts normally have 6 Health Bars.
    Challenge: The hardest of all difficulties. No supplies are give and Large beasts can have up to 9 Health Bars.

    As more players join the hunt, the overall HP of the beasts will increase. As you go up in difficulty the damage and defense of all the Small and Large Beasts will increase as well. The last option for difficulty is Intrusion. Intrusion becomes an option for hunts at level 30 and spans up to the level cap. If you open Intrusions you allow the following:

    Half the Fatigue cost of a closed hunt.
    Better rewards.
    Players up to five levels higher than you can enter the hunt to defeat you.

    It’s always easier to tackle in groups, but sometimes groups will make Beasts even more difficult. The harder difficulties increase your score, as long as you’re not healing or being beat up by Beasts, making it easier to get higher rankings for better rewards. Play how you want and with who you want as difficult as you want.

    Small Beasts

    Snowy Mountains
    Mammoth
    Antelope
    W-Wyrm or White Devilsaur
    Yeti
    Young Eel Lizard
    Young Balas Lizard

    Desert
    Stegodon
    Giant Crab
    Y-Wyrm or Yellow Devilsaur
    Sand Worm
    Young Sand Ray
    Young Ape Beast

    Rainforest

    Forest

    Swamp

    Volcano

    Large Beasts

    Ape King
    Blue Wyrm King / B-Wyrm King
    Basilisk
    Boar King
    Broad-Mouth Salamander
    Cabrite
    Chela King
    Corpse Flower
    Crazy Lizard
    Crazy Wolf
    Desert Worm King / D-Worm King
    Ghost Peeper
    Giant Crab King
    Gila
    Green Lizard
    Ice Beast
    Ice Wyrm
    Lacerator Beast
    Lizard
    Mammoth King
    Oasis Beast
    Pronghorn
    Red Wyrm King / R-Wyrm King
    Sand Ray
    Skeleton King Crab
    Sting Bee
    Swift Bat
    Toxic Spider King
    White Wyrm King / W-Wyrm King
    Wild Boar King
    Wingwolf
    Yellow Wyrm King / Y-Wyrm King
    Yeti King

    Star Instances

    A Star Instance is a significantly more difficult version of a hunt. The damage and defense of beasts are increased above their normal value. You only get one carve during the entire hunt from the main beast you are hunting and that carve is comprised of various leaves for selling. The main reward you get for doing Star Instances is reputation, but you can also receive Spar Debris from the reward boxes at the end of the hunt.

    (Small Challenge: First person to solo an entire star instance and make a video gets it posted here for posterity.)

    Red Temple Yeti King
    Silver Scaled Sand Ray
    Rock Oasis Beast
    Balas Lizard

    Hunting Events

    Jade Crown Dragon

    The Jade Crown Dragon is a small beast that can only be encountered by taking quests from Ivan in Village 3. You can attempt to slay him once per day with a daily quest and you can try again during the Jade Crown Event. Overall you can slay him twice per day which will earn you a chance for what is called a “Scale Pack”. Inside the Scale Pack you can find three things: Bound Bladestone, Silver Shin Leaves and very rarely a Battle Scroll. The Battle Scroll is a unique item, worth 3000 Jade Shells, that allows a player to learn another Weapon Mastery.

    Trumpet Event

    The Trumpet event occurs twice a day and all hunters can participate by talking to the Hunting Trainers in their respective zones. By talking to one of the Trainers you can claim the buff that increases your defense, attack power and experience gained when on a hunt. When you actually enter the hunt you can claim an extra Trumpet Revival Coinpack. The event is only an hour so make sure to make the best use of it.

    Section 7: Reputation

    Reputation is earned by doing daily quests given out by various quest givers. By successfully performing these hunts you will be rewarded with Hunt Emblems and reputation.

    How to earn reputation

    When you reach level 70 you will be able to pick three quests up from Hunt Trainer Bush in Village 1:

    Slay Swift Bat (Common Difficulty) 400 Hunter Mercenary Team Rep 5 Hunt Emblems
    Slay Lacerator Beast (Common Difficulty) 400 Hunter Mercenary Team Rep 5 Hunt Emblems
    Slay Skeleton Crab King (Common Difficulty) 400 Hunter Mercenary Team Rep 5 Hunt Emblems

    These quests will provide you with reputation with the Hunter Mercenary Team. When you reach 16000 or respected status with the team you will be able to pickup new and harder beasts to fight from Rep Quartermaster Emily in Village 3:

    Slay Red Temple Yeti – Kimo Clan 400 Rep 5 Hunt Emblems
    Slay Balas Lizard – Kimo Clan 400 Rep 5 Hunt Emblems
    Slay Silver Scaled Sand Ray – Jools Clan 400 Rep 5 Hunt Emblems
    Slay Rock Oasis Beast – Jools Clan 400 Rep 5 Hunt Emblems

    Each of these hunts are considered Star Instance Hunts and can only be performed twice a day. You also gain an extra 20 rep per hunt for their respective Clans for defeating the beasts.

    Benefits of reputation

    Using Hunt Emblems:
    Buy the level 70 Weapon Recipes
    Lacerator Weapons
    Swift Bat Weapons
    Skeleton Crab King Weapons

    Buy the level 70 Armor Recipes
    Lacerator Armor
    Swift Bat Armor
    Skeleton Crab King Armor

    With Kimo and Jools Reputation:

    Buy high level rune recipes
    Buy the CMD Armor Parts
    Buy the CMD Weapon Parts
    Claim Fatigue

    Current Reputations

    Hunter Mercenary Team
    Gold Gully Alliance
    Kimo Clan
    Jools Clan

    Section 8: Player vs Player

    Intrusion

    Intrusion is a form of PvP where a single or group of players enter a “Open” hunt in order to defeat the players inside. The players inside the hunt must defeat the beast they are hunting and either defeat or avoid the intruding hunters. The intruding players are successful when all the hunters in the hunt are defeated.

    The intruding hunters may not attack any of the beasts inside, but those beasts can still damage them. The intruding players may use Revival Coins to continue trying to defeat the hunters that hosted the hunt and potions to heal themselves. If the intruding players are unable to defeat the hunters, either by the hunters defeating the beast or being defeated, they are given a 3 minute debuff that prevents them from intruding again.

    If the intruding player manages to defeat a player they gain Murderous Look and their name changes color. Murderous Look decreases over time when sitting in the village, but enough is gained the player will find that every hunt scene they enter will announce to the server that they have entered it and they will not be able to close the hunt to prevent intrusion.

    How to intrude
    Simply speak to the PvP Admin in village one or two and select the option to intrude (need to get actual option and who to talk to names). From there a list of hunts will appear that you can select from to intrude into. As long as you meet the requirements, 5 levels within your level, then you can intrude into the scene. It is common courtesy to leave the scene if politely asked.

    Duels

    Arena

    Werewolf PvP

    Werewolf PvP is a event that takes place all day where 20 players join to battle for top score. To start the event one person must make a room and then the other players can join the room. After at least 10 players have joined a countdown will start before the match begins. Once the Match begins no more players can join. The Werewolf King will be a player selected at random when the match starts. The Werewolf king must defeat other players and the other players must defeat the Werewolf King. When the King defeats a player they are transformed into werewolves and must defeat their former allies. The rounds of the match will end when either all the Werewolves are defeated or all the players have been transformed. Points are earned by defeating other players as a Werewolf or defeating Werewolves. The person who scores the killing blow on the Werewolf king is awarded 5 points.

    The top 3 winners of the match will be able to open extra prize boxes. The prize boxes contain a number of useful things, but most importantly they contain Tickets which can be used in the Ticket section of the Cash Shop.

    Section 9: Tips & Tricks

    How do you set an AFK message?
    You can add a message to let people know you are away by clicking the small gear in the upper left of the chat box. You can then enter the message in the prompted box and click the check box for auto reply. When you press confirm anyone who tries to message you will receive your message.

    How do you know if someone is intruding on you?
    A System Message will display across the screen informing you of the player name and weapon they are using.

    What is Rage?
    You get rage for defeating other players. It increases your attack and defense for a short amount of time.

    What is Fatigue?
    It’s the resource used up to for hunts. You get 1000 daily and 3000 a week.

    If I reach level 40 and obtain a new Mastery, will that Mastery have full unused Mastery points?
    Yes

    What are Jadeshells? How do you get one?
    Jadeshells are used in buying may awesome features as well as Cash Shop items. You can go through the main website to buy some using Paypal currently.

    Why does my headgear not visible? How can I make it visible for others to see?
    Try going Options-> Basic Set-> Display your own helmet. -Espher

    What is masterkey? How will I know if I have one?
    A Masterkey is a cash shop item, that you can use to open the best box out of 3 in the end of the hunt. You can buy one from player shops if they are selling it. The item appears in the cash shop tab in your backpack when bought. -Espher

    What does xCMD mean?
    xCMD is a type of item that can drop in any high level hunt that can be crafted into one of the gag weapons. The gag weapons are very strong level 70 weapons with silly designs. The Greatsword is a giant swordfish or the crossbow is a giant lobster.

    What is HuntSoul and HuntElf mean?
    Naming conventions for the Rare Weapons that have a very low chance of being rewarded to the player at the end of a hunt.

    What does the Blue Exclamation on Bush’s head mean?
    It means he has a chain quest you can do. Currently it does not go away even if you completed all the chain quests you can do for a day.

    How do I turn off tracking for weapons and armors?
    There currently isn’t a way to clear it.

    Section 10: Pets

    Pets are new companions for all players. All the details of pets are not known yet, but this page will be updated further as more information becomes available. What we know so far:

    • You will be able level pets.
    • Pets will have their own Equipment.
    • You will be able to breed pets.
    • Pets can help in carving.
    • Pets can faint in combat, but revive shortly after.
    • There are three generations of pets each with different stats
    • Pets will carry stats over from breeding
    • You will be able to trade bound pets with a cash shop item

    Again this is just a few facts from the news update and this section will continue to get updated as more information is known.

    Hunter Blade Comprehensive Guide Images


    We also give random image about Hunter Blade Comprehensive Guide hope you like this, we got this
    images from arround the web .


    hunter 26489 54 inch charthouse outdoor ceiling fan blades included

    Hunter 26489 54 inch charthouse outdoor ceiling fan blades included


    hunter 28528 42" hudson ceiling fan, blades included

    Hunter 28528 42" hudson ceiling fan, blades included


     guide homethangs com introduces a guide homethangs com has introduced

    guide homethangs com introduces a guide homethangs com has introduced


    image source :
  • guidescroll.com

  • news.mmosite.com

  • news.mmosite.com
  • Gladiatus Beginner’s Complete Guide

    Below is an article titled Gladiatus Beginner’s Complete Guide that we collected from various sources. All credit goes to its original writer.

    Gladiatus Beginner’s Complete Guide by Kirbius

    .: Introduction :.

    Ave Gladiator,

    I am Kirbius an experienced Gladiatus player and your new teacher. I’ll be your New guide that’ll make your life as a Gladiator so much easier. I will tell you a lot about the new life you will have here in the Gladiatus community.

    I will explain the functions of every Ingame button, but it won’t stop there. You will be instructed about the way Expeditions function, and how to prepare yourself for the Arena, the explanations of Quests, Guilds, Dungeons, and the exploration of new Exotic countries.

    This guide may take a while to read… But afterwards, you will have a lot of knowledge about the game and soon become the envy of the gods.

    If you want to hear about a specific point, check the table of contents right underneath what you’re currently reading.

    If you wish to become strongest and most revered Gladiator of the Empire. Read on!

    Overview

    Once you have Registered on your Selected server, You have a choice to be either a Female Gladiator or a Male Gladiator. Bear in Mind, that once you have chosen your Gender, theres no going back !!!

    Once you have chosen your Gender , You have to activate your account, and you can Start Playing Gladiatus.Note: If you wish to register on another server Click on Me to choose another server you want to play on!

    _________________________________________________________________________

    Overview
    __________________________________________________________________________


    This is the overview screen. This is a very important place for you, this is the first thing you see after you log in. The Overview allows you to view the Statistics of your Gladiator,your Victories your Familia and it allows you to see your inventory and the equipment you are currently wearing.

    You will also be able to change your equipment here. If you have bought a new piece of equipment, you can now drag this piece of equipment into a spare space on your character view.

    Note: That once you drag an item into the character view (shown above) that particluar item will become soul-bound, this means that any item that is soul-bound cannot be sold on the Market or Guild Market.


    I want to Change my Name, how can I do this
    ?

    Simple, to change your name you must visit the hermit, – you can do this in two ways: Official way ( which will cost you 10% of your total Honor and gold) or Bribe arena manager( which will cost you 50 rubies-no gold, no honour will be lost)

    How do my stats infer directly to combat?

    Your Fighting Prowess is detirmined by the following above, Strength,Skill,Agility, Constitution and Charisma

    Strength is the most expensive statistic to train and is a relative gauge of physical prowess. For every ten points of strength, you will get 1 extra melee damage.

    Skill influences your chance to hit your opponent, it’s matched up directly against your opponent’s agility in battle.

    You calculate your chance to hit by this formula:
    Chance for hit = your skill/ (your skill + enemy agility) x 100 [always round down]

    To check any of these stats at any time go to your overview and hover over the green bars. Just like your skill is paired, so is your agility, except this time it’s your agility versus your opponent’s skill with the same math ideal as skill, except reversed for this example.

    Constitution is a measurement of your toughness and resilience. Each point into Constitution reaps 2 vital health points plus 1 to your total of health regeneration per hour. With 20 Constitution, that would be a bonus of 40 HP and 40hp/hour regenerated with rest or while working. The stouter you are, the more damage you can sustain before needing to eat, and heal faster while resting.

    Charisma is (as far as combat is concerned) pretty much just how lucky you are. Charisma can allow you to attack two times to the opponent’s one. Like the two variable stats above, this is also dependent on the difference between your training level and theirs. For a value that is greater than your opponent’s charisma then for every point you are higher you gain 1% to chance for a double attack every time you attack. (ChaLvL +1 = 1% for double attack, so ChaLvL +20 would be 20% chance and so on. All Equal and Negative integers are tossed and instead automatically given 0%.)

    Intelligance: Effects the amount of healing/Critical healing that is done during battles (this involves the use of mercenaries). Intelligence also affects usables (food item) as well. The higher the intelligence, the more you’ll heal when using an usable.

    Armour
    is the cumulative sum of all of your equipment’s armour bonuses. The main point of armour is it absorbs damage. At 0 it absorbs 0 – 0. After ~90 it absorbs 0 – 1, ~160 its 1 – 2, and ~280 it’s 3 – 4 etc., etc., etc. Damage is pulled together from strength (StrLvL/10 = +1 damage) and any bonuses on your items that may add to damage.

    How do I Heal myself?
    One more very important part of the game can only be done in this screen though – healing your character. Your Gladiator will heal X points an hour, which is affected by your Consitution , but next to that you are able to buy your Gladiator food, which restores X health points at the moment you have him eat it. To do so, drag the food you bought from your inventory to the picture in the overview. You will now see the health points being restored at once. Healing can only be done in the overview.

    What are Mug Links?

    Note: Remember that the mug Links are useful as they provide you the player with an ID, which is handy if you ever get hacked,so make a note of your mug Link always ! ! !

    As you level up, the appearance of your Gladiator will change. Here is how your Gladiator will look or will according to the level you are at.

    Levels 1-4

    Levels 5-9

    Levels 10-19

    Levels 20-29

    Levels 30-39

    Levels 40-49

    Levels 50-59

    Levels 60-69

    Levels 70-79

    Levels 80+

    Statistics

    _________________________________________________________________________

    Statistics
    __________________________________________________________________________

    The Statistics Tab will show you, ingame Progress, as you play Gladiatus. Such things you can Check out in the Statistics tab; How many Battles you have won, How much Gold you have Raided, How much Honour or Fame you have and How many Gladiators you have recruited.


    _________________________________________________________________________

    Victories
    __________________________________________________________________________

    Victories are achievements you get by completing Quests,Exploring areas,
    Defeating Dungeon bosses,Creating food etc. Gain enough victories and you will be the envy of the gods.

    There are currently 747 Victories to achieve in Gladiatus.

    You can use the victory you have achieved as your title.

    _________________________________________________________________________

    Familia
    __________________________________________________________________________

    The Familia, is a friends list, it can tell you if your buddy (real-life or Virtual) is online or not.

    You can invite your friends or other Players to your famila, by clicking the “Invite into your Famila” tab on a players Profile.

    _________________________________________________________________________

    News
    __________________________________________________________________________

    News Messages provide you with news regarding Gladiatus such as updates and bug fixes

    It also notifies you about ingame competitions and events

    _________________________________________________________________________

    Messages
    __________________________________________________________________________

    How do i communicate with other players?


    Messages allow you to communicate with other gladiators in your server.When you see this Icon that means you have recieved a message of some kind.


    Once you click the ‘Messages’ Button, you will see an overview screen. From here, you can navigate to your inbox or your packages, or, if you are using Centurion , you can manage your own folders here. If you decide to go to your Inbox, you will see all messages you have received and not yet deleted listed here. You can still open every message you received, by clicking on its name.

    _________________________________________________________________________

    Packages
    __________________________________________________________________________

    You will find out that packages are really important!. Not only items can be stored in your packages but gold aswell. The method of saving your gold is called packing or Banking.

    If you have any packages you can also see the information about the package.

    • The origin of the package.
    • The date the package was recieved
    • Information about the item (mouse-over the item to see the information.)
    • The date the package expires.

    You also have the option to delete a package.

    If you click on the delete button. This Popup-will appear. You can confirm whether you want to delete the item, or not.

    Remember Packages last for 7 days, Items will automatically be deleted and gold

    Hint: If you delete enough packages you gain a victory.

    _________________________________________________________________________

    Highscore
    __________________________________________________________________________
    The Highscore show you the top 1000 active players of your server. Its a great way of comparing your progress with other Gladiators or with other guilds.

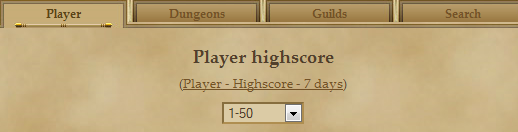
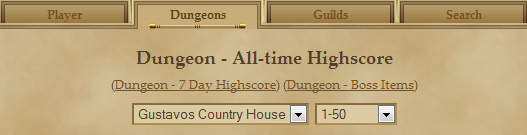
    The Dungeon Highscore will show you the highscores related to dungeons.

    Clicking on the Dungeon – 7 Day Highscore will show you which player(s) have dealt the most healing, damage etc.

    Clicking on the Dungeon – Boss Items; will show you the all the items that have been rewarded for completion of a specific Dungeon.

    _________________________________________________________________________

    Profile
    __________________________________________________________________________

    You will notice this in the top right hand corner of your screen.

    Clicking on Profile, will allow you to change the information on your account. Such things you can edit are.

    • You can change your Email address.
    • Profile Description
    • Mug Link Text (This text will appear to people you have mugged with your mug link).
    • Other Personal Information
    • Delete Account.


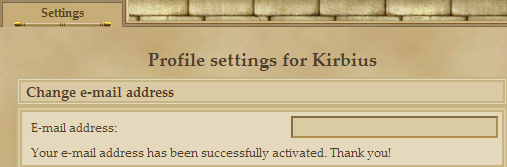
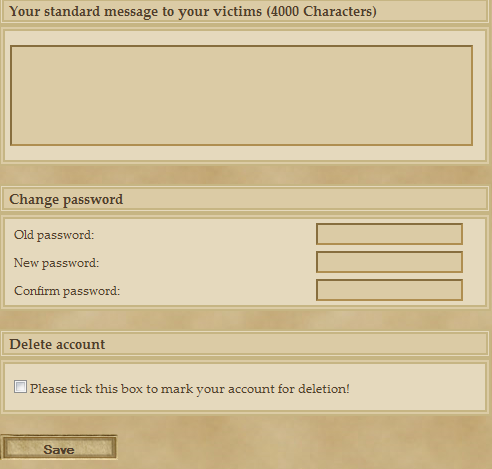
    Clicking on the save button confirms any changes you have made on your account.

    _________________________________________________________________________

    The Arena
    __________________________________________________________________________

    The Arena

    ________I.__________________II._________________III.________

    The Arena is the main feature of the game. There
    arena is where you and other gladiators can directly fight each other.
    The Arena has its very own ranking, which is based on your level. When
    you have just started you will start in the lowest legue, and will be
    placed after your joining number, but once you get over level 10 you
    will be free of all the level 1 and 2 accounts.

    You can only enter the arena once you are level 2.

    Each legue has its own champion who will get a bonus each hour, and if you can claim the champions place you will also be rewarded with the jackpot $$$. However, you should know, young gladiator, that there is only one way to work your way up though the Arena Ranking, and that is the hard way. You cannot just attack any Gladiator ranked high above you and take over his position. You should know too that, the higher you get up the ladder, the less Gladiators you will be able to attack in your own placing list.

    However, if you’re looking for a nice amount of Gold, you can always attack one of the players at the top of the Highscores list. They’ll usually have a fairly nice amount of Gold on them.

    To do so, you have to enter the Gladiators name into the ‘Search for certain player’ field you will see on the Arena page. This will cost you 10 Gold though. Additionally, you might encounter a message like ‘Your enemy is too weak to fight at this moment’, a message you should not encounter when wanting to fight somebody from your own placing list.

    What? You wonder why you should do all this? For the Gold of course! Every Arena Fight will grant you some gold, while some against opponents of a higher level will even get you Experience and Honor. You do not receive Gold always though. Your opponent might have so little gold that you cannot even raid a bit. You’ll usually raid about 10-15% of his Gold.

    If you are attacked in the Arena yourself, you’ll probably lose a lot of Life Points and some of your Gold. I should warn you – If you’re doing a quest, you might not even be noticed he attacked you. Don’t fear though, you will not die here, no Gladiator would be weak enough to kill you, and no Expedition Opponent will either. 

    _________________________________________________________________________

    Circus Omnipotens
    __________________________________________________________________________

    _____I.__________________II._________
    ________III.____

    In order to get on top of this arena, you have to win battles against gladiators from your league,from the Arena.

    _________________________________________________________________________

    Circus Turma
    __________________________________________________________________________

    _____I.__________________II._________________III.____

    Here you fight with your Mercenaries in the Arena against other players and their Mercenaries aswell. This arena is very Brutal, and the key to victory is a good mercenary setup. If you find this arena too much, you may leave the league.
    If you decided to leave the Circus Turma this message will pop-up; asking if you want to leave the league.

    If you click on “Yes” you have confirmed that you want to leave the league and thus leave the Circus Turma. Once you leave the Circus Turma you have a 24 hour cooldown time, before you can enter the Circus Turma again.

    _________________________________________________________________________

    Work
    __________________________________________________________________________

    …The Stables…

    One of the most Important things in Gladiatus is Gold, Gold can be earned by working in the following Jobs.

    This will turn out to be very useful later on, as, especially if you set yourself work and leave it over-night and when you get back online again, you’ll suddenly have lots of gold to spend. You can then spend this on the Shops, the Market or the Auction Building or Training or Donating to your Guild.

    However be warned they will be packaged in the packages tab and will stay there until 7 days,

    Useful Work Tips

    • Activating the Seal of Quaestor is a great way of earning extra gold.
    • Before you go to sleep or away from the keyboard, its always a good idea to set yourself to work.
    • Always remember that the gold you earn from working will be in your packages.
    _________________________________________________________________________

    Quests
    __________________________________________________________________________

    You can accept quests and receive information about accepted quests in the tavern.

    _________________________________________________________________________

    Tavern Quests
    __________________________________________________________________________

    Smoke-filled air nearly chokes you to death as you enter the vintage tavern. The owner, a former gladiator, gives you a nod as you go down the stairs to the room. There aren`t many people here at the moment – a good moment for a sip of cold wine and a little chat among friends.

    You can accept quests and receive information about accepted quests in the tavern.


    What could you be asked to do in Quests

    Get somebody an item. – To complete this quest, you have two options. The first, and probably the best in case of expensive items, is to do an expedition. You will then get the item you were sent out to get. Be sure to remove it from your Package and add it to your Inventory, or it won’t work! Then return to the Tavern, or to another point the one who gave you the Quest wants you to go. However, if you were told to get some cheap item, you also have the possibility to buy it in the Market. It will still be delivered to your packages and you can still give it to the guy you’re supposed to return it to. There are some special items that are wanted and those items can’t be found everywhere! You have to know exactly where to search for those.

    Pssst is a secret but I will share it with you if you promise to become a great gladiator! These are the special items that you will find only outside of the city:

    Bandit Finger @ Bandit Camp

    Stolen Casket @ Pirate Harbour, Bandit Camp

    Wolf Tooth @ Wolf Cave

    Bone Necklace @ Barbarian Village

    Disrupted skull @ Random

    2. Defeat a Gladiator in the Arena. – To complete this quest, go to the Arena and fight a Gladiator. After defeating him, go to the place the quest wants you to go. Please note: You should fight somebody from your ‘own placing’ list, not a gladiator much weaker than you are (exception made if those are actually in your own placing list ) .

    3.Explore one of the surrounding scenes. – To complete this quest, go out of the City to the Surroundings. Click the one you were told to examine. You should now get a short text which allows you to examine the area. After that, you’ll either be fighting an opponent or have a countdown screen saying you’re examining it. If you do get to fight an opponent, you will have to defeat him to complete the quest.

    4.Defeat X Bandits/Deserters/etc. – This is most certainly the most difficult task you can get. You’ll have to find out where you can find which opponent, and you’ll have to defeat two of these opponents. After you did so, return to the Tavern to get your reward. I will include a table saying who is to be found where right after this one. If you are Stuck on where to find them, use the NPC list. NPC List

    5.Speak with somebody in the city. – The guy in the Tavern uses difficult names to describe the one you should be looking for, but if you just click every button in the city, you will find the one you’re looking for. Once you did, read what they have to tell you and then click ‘continue’.

    Who is who in the City

    Stable-Lad @ Stable

    Master of the Arena @ Arena

    Publican @ Tavern

    Trainer @ Training

    Auctioneer @ Auction Building

    Mountebank @Market

    You can also vist the guard at the Tavern to do Dungeons, (pssssst they are very very Hard) to gain Fame, Gold and XP

    As a result of Completing Tavern and Guard quests , your Gladiator gains experiance and as you gain more and more experiance ,you will notice, that your Gladiator’s appearance will be changing as you level up.

    Here is what your Gladiator will look like, according to the level , you are currently at.

    Quest Tips:

    • Activating the pacts Secret Knowledge of the Artefact Collecter,Secret Knowledge of the Beast Master ,Blessing from Mercury, Blessing from Apollo; will give you an advantage with conducting quests.
    _________________________________________________________________________

    Guard Quests
    __________________________________________________________________________
    Guard Quests are quests that involve you completing a dungeon. These quests are hard, but the rewards are great.
    To accept Guard Quests, you have to be minimum level 10. If you below level 10 a message will pop up.
    If you are level 10 or above you, you can accept Guard Quests.
    You have the choice of choosing the difficulty of the quest, Click (Left-Click) on difficulty setting you want to choose.

    Once you have chosen this. You will see the description of your assisgnment. This description will give you a clue of the location of the Guard Quest.

    You have a 24 hour cooldown time before you can accept another Guard Quest.

    _________________________________________________________________________

    Expeditions
    __________________________________________________________________________

    As a Gladiator, you will be doing Expeditions, during your expeditions you can fight your enemies, who outside the city to gain Experience Points (Also known as XP).

    Expeditions are an important part of gameplay, as you can also recieve gold or even an Item from your defeated enemies.


    Patrol
    “Patrols are short, but this doesnt mean they arent dangerous”.This expedition costs 2 points (1 points if centurion).


    Scouting

    “This may take some time before you return. You never know where scouting will lead you, “.This expedition costs 4 points (2 points if centurion).


    Campaign

    “Fight Alongside the mighty Legionaires and proclaim the glory of Rome. The campaign is hard, and long. The enemy is stronger, but the reward for victory is far more greater.” This expedition costs 6 points (3 points if centurion).

    Once you have chosen your expedition, you will recieve a Battle Report of your expedition.

    Once you have finished your expedition, you will have to wait some time 5:00/10:00 mins, 10:00/20:00 mins, or 15:00/30:00 mins depending, The time you wait is known as the cool down time.
    You can skip this at the cost of 1 ruby.
    How often are expedition points added?

    Expedition points are added at the rate of 1 each hour regardless of whether you have Centurion or not.

    Useful Expedition Tips:

    • During Tavern quests “Defeat ‘X’ NPC”, its always best to use the 2 point expedition(1 point if you have centurion activated.)
    • If you are going away for while, click on the 6 point expedition (3 points if centurion). When you return you have quite alot of gold and XP.
    • Activating the pact(s) “Secret Knowledge of the Beast Master” and “Blessing from Apollo” are a great way of gaining alot of Gold and XP from expeditions.
    _________________________________________________________________________

    Shops
    __________________________________________________________________________

    The Shops will be very valuable to you as Gladiator. If you want to win against other Gladiators or Enemies encountered on Expeditions, you are going to need good equipment, which you can buy at the Weapon Smith, the Armour Smith, the General Goods Store and the Alchemist.

    ___The weaponsmith______________The armoursmith___________General Goods vendor__

    ______The Alchemist___________Mercenary trader____

    The weaponsmith sells weapons
    the armoursmith sells armour
    The General Goods vendor sells food, jewellery (rings and amulets), gloves/bracers and shoes.
    -The
    Alchemist sells you boosts, which you can drink 1 time to get a bonus
    for a duration of time, and upgrade stuff to permanently add some stats
    to your gear. If you wish to remove a permanent add on some of your gear
    you have to buy detergent sponge to remove it.
    -The Mercenary Trader: Sell Mercenaries , which will aid you in the dungeons
    -The Jeweller sell you Rubies
    You
    can buy items at the Market or the Auction Building too, as I will
    explain to you in the next lesson. In this lesson, you will get to know
    what you should buy where, and where you can dump stuff you no longer
    need.

    NOTE:
    That The Weapon, Armor, General Goods, and Alchemist stores all restock
    every hour (60:00 minutes) or all four can be convinced to at any time
    if you have ten rubies to entice them with. All types of items can be
    sold at the Market. You choose the price, but beware, if your price is
    too high, they’re going to buy someone else’s item before yours! If you
    don’t want to rely on another player buying your items though, and you
    need your gold right then you can always sell items to the correct store
    that wares them.

    First of
    all, you should know there are 2 different kinds of items. There are the
    items around your level, which you can buy for Gold, without having to
    pay the rare Rubies. However, if you want to buy a really strong item at
    the Smiths / Shop, you will have to buy them using both Rubies and
    Gold. That does mean though that, when you raise some levels, you will
    be able to buy these items without having to pay Rubies.

    To buy
    an item, you first have to get yourself enough Gold and/or Rubies,
    because the item will not stay in your inventory once you dragged it
    over there otherwise. Once you acquired enough gold, you have to go to
    the place you want to go, and drag the item you want to buy towards your
    inventory. You can now move items around from your character to your
    inventory and the other way around to get your new shiny item in the
    best place.

    You can also sell your items to the shop / smiths
    owners. To do so, get to the third page in the shops inventory. The
    third page is the one marked ‘III’ (Roman for 3). This page should be
    empty, and you will be able to drag any of your items, except for quest
    items, in here. You will now receive an amount of gold equal to the
    Value your item had. Selling items at the Market will get you more gold
    most times though.

    This is because, if you decide to put
    something for sale on the market, you can decide the price you want to
    sell it for. As long as this is lower than the price people can buy it
    for in the shops, you should be able to sell them for quite a bit more
    than it’s value, as the shop price is around 3 or 4 times the items
    value.

    Market


    …The Market…

    For players searching for a new item, the Market is still cheaper than the shop most times, and it features way more items. You can sort them on the kind of item you’re looking for, and once you did that, you can also sort them on price. This way, you are able to find the item you are looking for quite fast, even though the Market doesn’t really have a good overview for now.

    Try searching for an item you need by Typing in the name of the certain item, and also using selecting what type of item your looking for will narow down your search

    Price: You can select the price you wish to sell the item for. Remember that the fees will be affected by the price.

    Duration: You can select the duration (2 hours, 8 hours, 24 hours or 48 hours (Seal of the Aedil activated) that the item will be on the market.

    Fees: This is the automatic fee that you have to pay the marketeer, to put your item on the market. The higher the price you place your item for the higher the fee you will pay.

    You have the option to search for a specific items on the market.

    Click on the Filter button to search for the items

    If no items that match your what you are looking for using the filter system, this will appear.
    You will notice this at the bottom of the Market window, you can change pages to see what other items are on the market
    Warning: Due to the Pushing Rules, you can only sell items that are level 1-10 for 1000 gold maximum.

    You can sell items that are level 11 on up for no more than twice their value.

    “Rare” Items can be sold for more than twice their value.

    Ask the Game Operator of your server to see what items are considered “rare”.

    You can see a copy of the “Pushing Rules” Here

    Useful Market Tips:
    • Activating the Seal of Aedil or Seal of Patrician, will give you an advantage in the Market, especially if your selling items.
    • It
      is always a good idea to sell items on the market, when you have
      started the game. That way you will have an advantage when you enter the
      arena

    Auction House

    “The old building has its own charisma. A slave opens the door for you and you are amazed to see so many artefacts from all known and unknown places of the world. You can purchase various special items here. The offer of objects is renewed regularly.”

    …The Auction House

    If you need a really good item, you can use the Auction Building too. It sometimes offers really good items, but you will be competing with other users to get the item. If somebody else offers more gold for the item then you do, you will not get the item, and you will not receive your gold back either! You can, however, buy the item using Rubies and Gold to make sure you get the powerful item you want. If you want to use the Auction Building, you should be aware of the risks! Word of advice Bid at VERY SHORT I placed a bid on an item in the Auction House and now the item’s gone and so is my gold! Odds are, you were outbid. In any case where you are outbid, all gold (as advertised on the Market, and heatedly debated on the forums) is lost to the cause. In the random case where you just so happen to check back and realise that someone outbid you, then you can re-earn the gold that you lost as well as enough to overbid the other player and try to snake them at their own game. However, usually it’s much easier to amass a nice sized pile of gold to throw at an item if you absolutely don’t want to lose the item. On the opposite side of the coin, sometimes great items can be purchased for lower than what you would expect.

    Auction Tips:

    • It is usually best to Bid on an Item at “Very short”
    • Don’t bid a very large amount of gold on an Item you desire, chances are someone else will have more gold than you, and outbid.
    • If someone outbids you, outbid them back, wait a minute or 2 and then attack them. Its a good raiding technique.
    • Use the search function, it really does help you find the item you want.

    Items

    Items are very important in Gladiatus. How else are you meant to defend yourself against other Gladiators, or the Enemies of Rome who “thirst for your blood”.

    When you mouse-over an item, a window will appear. This window provides you with the stats of the item you have moused-over.

    Weapons

    Weapons are essential part of Gladiator’s gear as long as it does a decent amount of damage, you should be able to defeat your opponent.

    What’s the differences between all the weapons?

    The different weapons are all the same in terms of attacks they can make and how they are made. The only real variables that should heed admission of thought of weapon should be damage and their possible

    (though not guaranteed) bonuses to stats. Weapon types, lengths, and shapes have are no indicator to it’s usefulness. As with any other items, the higher the level, the higher the quality of item. The name

    also has a pretty direct correlation on the items worthiness, though sometimes misleading. Hover over any items to see what exact benefits or losses come to equipping them.

    1.Short sword/Short dagger/Club
    2 Sharp dagger/Battle sickle
    3 Broad sword/Gut graze
    4 Trident/Axe/Long sword
    5 Tridentlance
    6 Hammer/Broad axe
    7 Angel of death
    8 Schiavone
    9 Gladius
    10 –

    Armour Like, weapons, armour is an essential part of a Gladiator’s gear, without armour you are most likely to perish and your name will be forgotten, within the blood,dust and sand of the arena. Armour includes Helmets,Chest Armour,Gloves and Shoes
    Jewellery Jewellery are useful items, especially when more Hero prefixes and other suffixes are involved. Upgrades can be applied to Jewellery, this could make a differance between victory or defeat.
    What Are Upgrades, and How do I use Them? Upgrades are objects that can be used to upgrade your Armour, Weapons, and Jewellery. Upgrades Can be Bought from the Auction House, The Market, Guild Market, and The Alchemists.Remember!!!:Upgrades” have a permanent effect on your Items and Can only be removed with a detergent sponge

    Reinforcements

    What are Reinforcements and How do I use them?

    Reinforcementsare Objects that can be used to Boost your Armour, Weapons and

    Jewellery and your Gladiator’s Health. Reinforcements can be bought from

    the Auction House, The Market, Guild Market and The Alchemists.

    Remember!!!

    Reinforcements have a Tempory Effect on your Items and the duration of

    the this boost can vary with the item being used.

    List of Reinforcements and Duration effect

    Leather shred (Increases your Armor value for 1 hour)

    Small Grindstone (Increases your Damage value for 1 hour)

    Hawthorn (Increases your Health points for 2 hours)

    Tagairoot (Increases your Health points for 4 hours)

    Ginkgo Leaves(Increases your Health points for 8 hours)

    ______________________________________________________________________________

    Dust of strength (Increases your strength for 1 hours)

    Flask of Strength (Increases your strength for 1 hours )

    Ampulla of Strength (Increases your strength for 2 hours)

    Flacon of strength (Increases your strength for 4 hours)

    Bottle of strength (Increases your strength for 8 hours)

    ______________________________________________________________________________

    Dust of Aptness (Increases your skill for 1 hours)

    Flask of Aptness (Increases your skill for 1 hours)

    Ampulla of Aptness(Increases your skill for 2 hours)

    Flacon of Aptness (Increases your skill for 4 hours)

    Bottle of Aptness (Increases your skill for 8 hours)

    ______________________________________________________________________________

    Dust of Agility (Increases your agility for 1 hours)

    Flask of Agility(Increases your agility for 1 hours)

    Ampulla of Agility (Increases your agility for 2 hours)

    Flacon of Agility (Increases your agility for 4 hours)

    Bottle of Agility (Increases your agility for 8 hours)

    ______________________________________________________________________________

    Dust of the constitution (Increases your constitution for 8 hours)

    Flask of the constitution (Increases your constitution for 1 hours)

    Ampulla of the constitution (Increases your constitution for 2 hours)

    Flacon of the constitution (Increases your constitution for 4 hours)

    Bottle of the constitution (Increases your constitution for 8 hours)

    _____________________________________________________________________________

    Dust of the charisma (Increases your Charisma for 1 hours)

    Flask of the charisma (Increases your Charisma for 1 hours)

    Ampulla of the charisma (Increases your Charisma for 2 hours)

    Flacon of the charisma (Increases your Charisma for 4 hours)

    Bottle of the charisma (Increases your Charisma for 8 hours)

    ______________________________________________________________________________

    Dust of the Intelligence (Increases your Intelligence for 1 hours)

    Flask of the Intelligence (Increases your Intelligence for 1 hours)

    Ampulla of the Intelligence
    (Increases your Intelligence for 2 hours)

    Flacon of the Intelligence (Increases your Intelligence for 4 hours)

    Bottle of the Intelligence (Increases your Intelligence for 8 hours)

    RecipesRecipes are items which essentially act like Reinforcments. .Recipes have to be stored in your libary, once stored they can be activated. The activated effect of a recipe only lasts 1 hour.
    Blessing of strength (Increases your Strength for 1 hour)
    Blessing of Aptness (Increases your Skill for 1 hour)
    Blessing of Agility (Increases your Agility for 1 hour)
    Blessing of the constitution (Increases your Agility for 1 hour)
      Blessing of the charisma (Increases your Charisma for 1 hour)
    Blessing of Life (Increases your HP for 1 hour)
    Blessing of Might (Increases your damage for 1 hour)
      Blessing of (Increases your Intellligances for 1 hour)
    Usables

    Usables (Better known as food items) are items which restore your Gladiators health.

    Here is the list of Usables you can use.

    Apple

    Bananna

    Cheese

    Fish

    Steak

    Bread Rolls

    Bread

    Chicken

    Health Potion

    Cake

    Usables Combinations

    + —>

    Apple + Bananna = Fruit Bowl

    +—>

    Apple + Chicken = Feast

    +—>

    Bananna + Bread Rolls = Bananna Roll

    +—>

    Bananna + Bread = Bananna Sandwich

    +—>

    Cheese + Bread Rolls

    +—>

    Cheese + Bread = Cheese Sandwich

    +—>

    Fish + Bread Rolls = Fish Roll

    +—>

    Fish + Bread = Fish Sandwich

    +—>

    Steak + Bread Rolls = Steak Roll

    +—>

    Steak + Bread = Steak Sandwich

    Formula for Usables

    As long as your Intelligence is less than 100 (less than 115 actually) then it is worth combining 2 level 50 objects.

    The number of HP is a multiple of L = (level of the usable + square root of (level of the usable))/2

    Example:

    We will calculate L for a level 7 chicken.

    L= (7+ square root of 7)/2 = (7 + 2.64)/2= 9.64/2= 4.82

    so we have L, now we will calculate HP for the chicken:

    HP of chicken = L*34= 4.82*34=163.88 = > the HP restored will be 164.

    = L*8;

    = L*20;

    = L*16;

    = L*12;

    = L*26;

    = L*50;

    = L*10;

    = L*14;

    = L*30;

    = L*34;

    = L*46;

    = L*30;

    = L*36;

    = L*28;

    = L*34;

    = L*48;

    = L*54;

    = L*34;

    = L*40;

    = L*22;

    = L*38.

    At this formula you will get the intelligence bonus. The current intelligence that you have (not basic one and not maximum one – but effective one) will be added to the HP restored in total.  

    Premium

    In Gladiatus, you have the choice to pay for the Premium features of game, or play for free.

    The Ingame premium currency of Gladiatus, are “Rubies”

    Any problems with payment, the Payment Team will help you https://support.gamepay.de

    What are Rubies, How do I get them?

    Rubies are a very special type of ingame Currency, they can be bought from the Jewellers with
    “real money” via various payment methods, these payments vary along with their costs,
    Rubies can also be found in Dungeons or Expeditions and Special Ingame Events.

    …The Jeweller…

    I recommended that you Buy Rubies…

    What are their uses, and what advantages do i get from them?

    The Advantage of being a Ruby user is being able to buyout items in the auctions, Activate Pacts,and activate Centurion, change your Gender to be either a Female or Male Gladiator, change your name and also skip the Expedition,Dungeon and Travel cool time, that way you can increase your
    level faster, and become a Stronger Gladiator much faster.

    Centurion

    What is Centurion?

    Centurion is the premium feature to Gladiatus, the benfits of activating Centurion can be found below.
    • Per activation you receive half a day`s wages of a stable boy
    • Only a 5 minute battle block in the arena now
    • Maximum amount of expedition points raised to 24
    • Expedition duration and costs have been halved
    • Additional bag in your inventory
    • Better message menu (message file)
    • Ignore list for player mails
    • Colourful highlighting of guild members

    Pacts

    Heres a List of the Pacts available and a description of what they can do?

    Blessing from Apollo; The God of Poetry is fond of your talents and gives you his Blessing – That your Epic may go down in History – You have a 10% chance of not using any Expedition Points and Maximum Expedition Points are increased by 50 %.

    Blessing from Ceres; The Mother of the earth is bestowing you with her mercy and with godly health – The Regeneration of Life Points is increased by 50 %.

    Blessing from Venus; The Touch of the goddess of Love and Beauty gives your charisma a Godly Trait-Maximum Charisma is increased. Conditions:Need to be Level 20 or above

    Blessing from Mercury; From Now on the god of travellers is waching over your expeditions, Reduces the cost of skipping, the waiting Time in Taverns- The Waiting Time until you can accept a new quest at the publican’s is reduced by 50 % Conditions: Need to be Level 40 or above

    Blessing from Jupiter; The father of Gods is looking after you – Your Life Energy is brimming over with Godly Energy – The Life points from constitution are increased by 50 %. Conditions:Need to be Level 60 or above

    Seal of Praetor; The seal of Praetor allows you to recieve goods which are not meant for you – You can use items that are available 2 Levels above yours.

    Seal of Patrician; From now on the Patricaian seal grants you, access to the secret warehouse of the merchant -The waiting Time For new goods at the Merchant’s is reduced by 50 %

    Seal of Consulate;As a messenger of the conulate, the merchants are going to offer you Fair prices from now on – Items can be sold/ Bought at a reduced rate of 5 % at the merchant’s. Conditions:Need to be Level 20 or above

    Seal of Quaestor With the seal of Quaestor you are going to get a higher fee for regular work. The pay for work is increased by 3 % Conditions: Need to be Level 40 or above.

    Seal of Aedil ;With the seal you can avoid alot of bribes at the market -The market fee at the market is reduced by 50 % and Allows sales at the market to last for 48 hours. Conditions:Need to be Level 60 or above

    Honour of the Berserker The berseker Honour is only given to Gladiators, who have become famous through their Fatal tactics – The total damage is increased by 25 % of the playing level or by a minimum of 2

    Honour of the Armour : Armourers are warriors that are so skilled in the use of their Favoured Weapon that they are rendered untouchable -Maximum Skill is increased.

    Honour of the Veteren :The Veteren Honour is given to those Gladioators who have perfected their Martial Art -Gives a 10% Chance of causing a Critical Hit Condition

    Blessing of Venus

    Honour of the Hero The Honour of the Hero is given to fighters whose physical strength is much higher than those of ordinary mortals: Maximum Strengh is Increased

    Honour of the Destroyer ; The warrior whose strength and technique cannot be beaten by any Type of armour and shield, gets the Honour of the Destroyer – Lowers the armour value of the Opponent.

    Secret Knowledge of the Ancients ; Those who master techniques of the ancestors are able to acquire new Knowledge fast and effectively – Gives you 10 % chance of getting doubled amount of experiance points ConditionForfeited at Level 40

    Secret Knowledge of the Beast Master;The ancient secrets of the beast Master do not only include the high art of tracking but also a wide knowledge about the creatures of the wilderness – The chance of Finding a searched opponent is increased by 50 %

    Secret Knowledge of the Artefact Collecter ; The secret cult of the Artefact Collecter is collecting information about all occult and mystic items since the beginning of the Roman Empire – Chance of Finding a searched item is doubled. Conditions Need to be Level 20 or above

    Secret Knowledge of the Assassin ; The secret society of the assassins teaches strictly protected techniques of sneaking , arobatics and evasion Maximum Agility is increased Conditions: Need to be Level 40 or above

    Secret Knowledge of the Immortals ; The box of the immortals is said to possess an elixer which gives you eternal life – Maximum Constitution is increased.

    Conditions Need to be Level 60 or above


    Gold Protection

    “For a small fee you can leave your money at the Priests of Mars. No one
    will dare to steal a single coin from you then”

    • Opponents cannot loot any more Gold from you
    • The Gold protection can be extended or cancelled at any time
    • The Gold protection can only be activated every 4 hours
    • You cannot carry out an attack in the arenas while Gold protection is activated
    • You can continue taking part in expeditions or dungeon fights

    Medals of Honour

    Medals of Honour are items which change the appearance of your Gladiator. Medals of Honour can be bought from the Alchemists. Medals of Honour cost Gold, but the premium version of Medals of Honour, (which are Golden) costs rubies.

    When you mouse over the Medal’s of Honour icon, you will see such infomation.

    To see what each Medal of Honour and Golden Medals of Honour appears like, please see this:

    Silver & Golden Medals of Honour

    Guilds

    Guilds are an important feature in Gladiatus. A guild constitutes a bond between players usually with a common goal, or a multitude of other reasons (nationality, protection, crashing, domination, High score,

    Wars…etc) or simply because they are all from the same school or workplace, and have real life friendship. Guilds are also a great place to meet new friends, and new enemies!

    To found your own, you will have to be a Level 5 Gladiator – The game won’t let you found your guild otherwise. If you decide to join a Guild, just hit the ‘Search Guild’ button, and search a Guild. I strongly recommend you to take a look at the high scores first, they’re great to find a Guild which matches your strength. To find your own, you will have to be a Level 5 Gladiator – The game won’t let you found your guild otherwise. If you decide to join a Guild, just hit the ‘Search Guild’ button, and search a Guild. I strongly recommend you to take a look at the highscores first, they’re great to find a Guild which matches your strength.Before you Found your guild you need several things in order to be successful, but

    remember, starting an guild is hard, you have to have a flair for what’s in, to get yourself noticed among the multitude of other Gladiatus guilds you need to be Charismatic, Adventurous and tactful. CAT.

    As a leader, but as a player you need this attributes. So that means, a good rank and a good reputation, being a flamer on the forum, a sore loser in the battles is never an indication of a strong player.

    Experience means not only holding a good rank, but also several months game experience is vital, preferably holding an advanced rank in a strong, established guild will give you experience in Gladiatus leadership.


    The Guild ‘core

    People often refer to this; this is what is called the ‘main’ members of your guild. Or what you might call a ‘best friends’ in life. Nobody wants to join a guild with just 1 person in it, u

    Forming a guildwith people you know in real life: is a great way to get an guildmgoing. Mates from the workplace, school, college, neighbourhood… etc. these are all great ways to form an guild because it adds a level of trust, interoperability and friendliness. This also works with fiends from other online games. Once you are in a Guild, your Guild Master will have given certain privileges to you – or not, ofcourse.

    Those privileges don’t really need an explanation, ‘show guild donations’ for example should speak for itself.

    Guild Ranking

    Here is something about the ranking system. You are, as Guild Master, are not able to change the default privileges (Member). You can, however, create a new group which you can then give certain privileges.

    You can then move the users to this new group. To donate gold, or upgrade the Guild Building, you’ll have to use the ‘Guild Building’ Tab, it cannot be done from the main screen

    Guild Buildings 

    Here is an Overview of the Guild , Here you select ,upgrade and use these buildings to benefit you in a variety of ways

    ________I.________________II.______________III._______________IV.______

    I. “Guild” tab is an overview of every building you have.

    II.”Forum Gladiatorius” is the place where you can find information about the guild description, tag, name, fortune, members, your rank in the guild and other.

    III. “Administration” is the place where you can send guild mails and chat with the guild members and also where you can see if there is a gladiator applied at your guild(if you have enough rights).

    IV. “Building” This tab provides you with information about the fortune of your guild. The levels and costs of your existing Guild buildings.

    Guild Buildings Overview

    Mercenaries

    What are Mercenaries? Mercenaries are units that can be bought at the Mercenary Dealer, the Market or the Auction House. Their sole purpose is to aid you in your dungeon quests.You can assign four Mercenaries at any one time by dragging their icon into one of the four slots you have available at the top-left of your dungeon character. (See below) The max number of Mercenary’s is 4.

    Mercenary 1

    Mercenary 2

    Mercenary 3

    Mercenary 4

    These are the three different types of mercenaries
    and
    as you might have guessed from this, each Mercenary has their own
    speciality. Nevertheless, you can assign each of your Mercenaries to do
    whatever you would like them to do (although I would suggest that you
    tell Medics to heal, Warriors to fight and Defenders to defend – fairly
    obviously!)


    To assign your Mercenary with a task simply click on their icon (on the
    right) and then click on one of the following icons in the top-right
    corner of their window:


    Defend

    This
    option allows you to tell your Mercenary to defend your group. He will
    basically attract most of the enemy’s attention onto himself. This means

    that your more ‘valuable’ team members will live longer and hopefully
    accomplish their task. It is a good idea for this Mercenary to have good
    armour, agility, strength and charisma.

    Attack

    This option tells your Mercenary to attack. Therefore, they need to have high damage equipment, good charisma, good skill and good strength.


    Heal

    This
    options tells your Mercenary to heal the group when it is their go,
    rather than attack the enemy. How much a Mercenary heals is determined
    by their Intelligence so they need good intelligence to be effective.

    This
    final option allows you to tell your Mercenary to stay behind! I don’t
    know why you’d want to use this, you’ll need all the help you can get .

    If your stuck on Finding these Enemies use the npc list for the dungeons

    Which items should I use to equip my mercenaries?

    Example of a set up mercenaries:

    between 1 and 3 attackers (levels 9-11), the more attackers the better obviously.

    set the attackers up with:

    -as high skill as possible (every once in a while, you can see a merc with extra good stats for his level – get him!)

    -equipped with weapons/armors with critical attack modifiers (the best at low level is Martial Arts -

    -next important weapons/armor is those with +damage: start with “of
    conflict”, particularly good because it also adds skill, but then aim
    for better (assassination and Rayols ideally, but also poison,
    brutality, apprenticeship…)

    The Healer, is an Important Merc because he’s the one who lets you stay alive long enough to deal enough damage and kill the guy.

    I would actually start with him, as you can kill some of the first
    monsters with just 1 well equipped attacker (as above) and 1 healer.

    However, you shouldn’t take a healer, but a defender
    (shield icon) to do the job, because in the end intelligence is not
    very important, healing modifiers on weapons/armors give you much more,
    and the tanker has much more HP, helping him survive and cure himself.
    Furthermore, he will have more charisma than a healer, helping you
    avoid a deadly double attack.

    Set the defender up with:

    -high charisma (as for the attackers, if you wait a while, you’ll see a merc with extra good stats)

    -high HP, but that’s really not as important, as long as he is a tanker.

    -weapons/armors with healing modifiers and critical healing modifiers. I recommend “religiousness”, which is very good in both.

    -as a bonus, some weapons/armors with blocking modifiers (Parade or evasion are pretty good)

    Changing Mecernary Names.

    You have the Ability to change the names of your mercenary

    You are now able to Travel to Exotic Countries like Africa and Germania,
    there you will encounter new Dungeons to explore, new people to see more
    Quests and even More New and Terrifying Enemies to slay.


    …Rome…

    To Travel to another country you have to complete certain Dungeons, but also you have to go to the Hermit and pay him for a pass

    What i need to do to travel in Africa or Germany?
    In
    order to travel from Italy to Africa, from Africa to Germany and from
    Germany back to Italy, you have to complete first some dungeons.

    To travel from Italy to Africa you have to complete Mist Mountain – The Dragon Stronghold.
    To travel from Italy to Germany you have to complete Wolf Cave – The cave of dark intrigue
    To travel from Africa to Germany you have to complete Blood Cave – Chamber of Pyro
    To travel from Germany back to Italy, you have to complete Wolf Cave – The cave of dark intrigue.

    To travel from Germany back to Africa you have to complete Cave Temple – Dark Catacombs

    Dungeons

    Dungeons are places you can travel to where you fight a series of
    enemies to reach a boss, the Boss if defeated gives you Fame,Money and
    an item or even a very rare Item.

    Here is all the Dungeons in Gladiatus:

    Level 10- Dark Woods, Gustavos Country House(Italy)

    “Hidden deep in Grimwood, there is a path flanked by murky looking trees. If you believe what the old people say around here, there once lived a very popular king in these woods. Rumour has it, that this king made a pact with the dark side so that he could continue to reign forever.
    Level 20 – Mist Mountain – The Dragon Stronghold (Italy)

    There`s always something special about entering the lair of a dragon” at least that is what a courageous hero`s widow is saying.

    Level 30 -Voodoo Temple – Temple of Perdition (Africa)

    Level 40 – Blood Cave – Chamber of Pyro (Africa)


    …Pyro…

    Level 40 – Wolf Cave – The cave of dark intrigue (Italy)

    In the hills south of the barbarian village there is a cave system that is called wolf cave by the townsfolk. As the name indicates, a large wolf pack is living there who also attack the surrounding farms during hard winters.

    The odour of decay streams through the cave`s entrance and one can hear bones splintering. The wolf pack has assembled and is rejoicing in the gifts of nature.


    …Hell Dog…

    Level 50 – Cave Temple – Dark Catacombs (Germania)

    As the old saying used to go “We are born from ashes and ashes we will become”. Doesn`t it then make
    sense for us to devote a temple to the element that determines the cycle of life? From the entrance of the temple a short cry can be heard and then everything is calm again except for the gruelling cracking sounds of insects.

    Level 60 – Cursed Village – Viking Camp (Germania)

    Once the scene, of fishermen rejoicing their daily catch, and children playing. The village has been devastated and sits lonely on the coast. No fishermen are alive; no joyous children`s voices can be heard; everything is dead. One can already detect the traces of destruction from afar.

    Multiple voices join together to form a song and the knocking together of beer mugs can be heard. From a safe distance one can see Vikings celebrating something.


    …Homo Nautilus…

    Level 70 – Ancient Temple – Hidden Grave (Italy)

    It is long forgotten for which God this temple was erected for. Nonetheless, the old, simple ruin still has an aura of mysticism and power. This distant place of worship, towers majestically above the lowlands.

    From the inside of the temple, you can hear knocks and aggressive muttering and swearing. Tomb raiders try their luck. Except for the two of them, the hall is empty. Besides the trenched hole a dirty fountain and a beautiful mural painting are the only eye catchers.


    …Nekromer…

    Level 80 – Umpokta Tribe – Fairground (Africa)


    …Papa Sasama…

    Level 90 – Death Hill – Mysterious Laboratory (Germania)
    “The loss of the cave temple poses a considerable problem to the
    dwellers: Where to put the dead?”


    …Frank.N.Stein…

    Level 100 – Barbarian Village – Zagrashs Fort (Italy)
    “Brave Gladiator” who would have thought that barbarians were capable of building such a well-fortified fort? The towers are manned with archers and guards who patrol the main gate. Through the main gate you can hear, chanting, and recognise the scences of obscure magical activities.


    …Zagrash…

    ??? ???

    Countries

    Once you have chosen, be warned if you still have quests (Guard or Tavern Quests) in-complete; this message will pop-up. You then have a choice either go back and complete these quests or cancel them.

    Once you have chosen the country you wish to travel to, it will take 3 hours to travel to your destination.

    You could play the shell game for 5 rubies (skips the cooldown time of travelling) and arrive at your destination instantly.

    What i need to do to travel in Africa or Germany?

    In order to travel from Italy to Africa, from Africa to Germany and from Germany back to Italy, you have to complete some dungeons.

    To travel from Italy to Africa you have to complete Mist Mountain – The Dragon Stronghold.
    To travel from Italy to Germany you have to complete Wolf Cave – The cave of dark intrigue
    To travel from Africa to Germany you have to complete Blood Cave – Chamber of Pyro
    To travel from Germany back to Italy, you have to complete Wolf Cave – The cave of dark intrigue.
    To travel from Germany back to Africa you have to complete Cave Temple – Dark Catacombs

    A Special Thanks to the Contributers to this Guide

    Ares
    ColdFusion
    Ibro
    Eluria
    Lil` Evil
    Transfixer
    SleepingBeauty/Black_Widow

    Gladiatus Beginner’s Complete Guide Images


    We also give random image about Gladiatus Beginner’s Complete Guide hope you like this, we got this
    images from arround the web .


    image source :
  • blog1.mapolismagazin.com

  • www.believersbookshop.co.uk

  • www.pubsub.com